
Warning: This system is not a lifesaving system and is not intended to be solely relied upon by user for supervising an area of safety concern. This system is meant to supplement active human supervision of minors. This system is subject to technology shortfalls as (but not limited to) interruptions in electrical power or Wi-Fi signal. Always make sure minors are properly supervised by an adult. For more information on pool safety, please see Pool Safely .
What’s in the box:
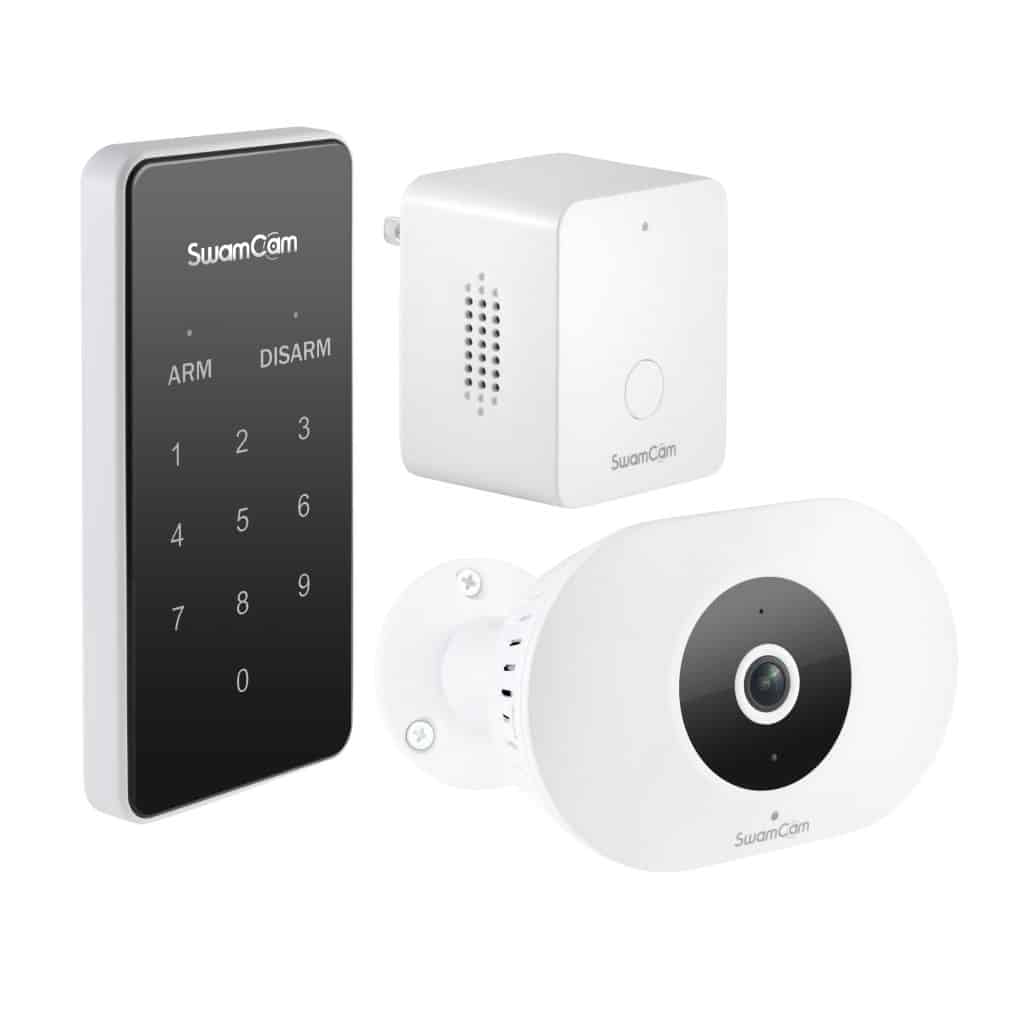
- SwamCam CameraWiFi
- Alarm/Repeater
- Keypad
- 20 foot power cable and power adapter
- Assorted Mounting Options
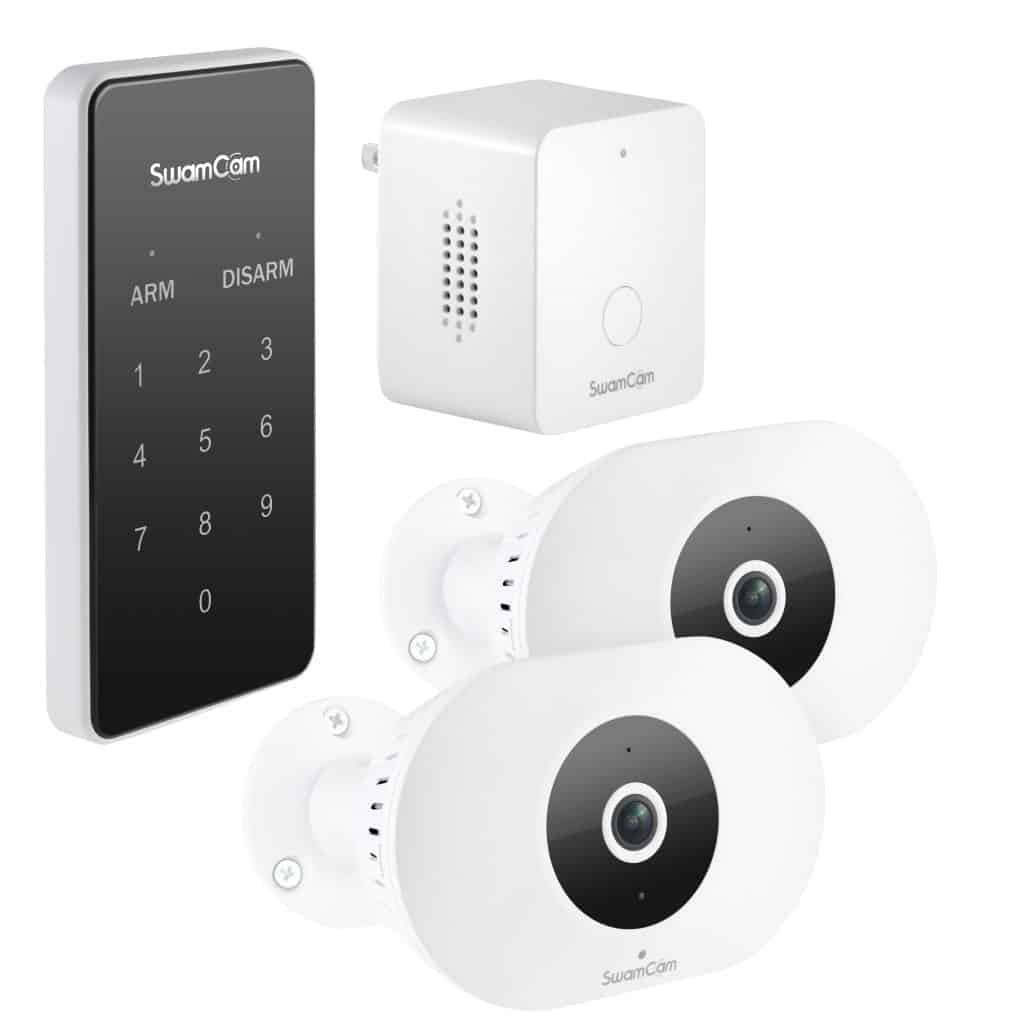
- SwamCam Primary Camera
- SwamCam Secondary Camera
- WiFi Alarm/Repeater
- Keypad
- 2X 20 foot power cable and power adapter
- Assorted Mounting Options

- SwamCam Camera
- Simple Alarm
- Keypad
- 20 foot power cable and power adapter
- Assorted Mounting Options
- SwamCam Primary Camera
- SwamCam Secondary Camera
- Simple Alarm
- Keypad
- 2X 20 foot power cable and power adapter
- Assorted Mounting Options
SwamCam User manual version SCCAMUM 02.06.26
- What’s in the box:
- Registering a SwamCam Account
- Adding Camera to iOS
- Adding Camera to Android OS
- Adding Components to a Camera-Based System
- Live View
- Understanding the SwamCam Camera
- Using the SwamCam Dual Camera
- Keypad Functions
- Changing the Access Code
- Using the Alarm/Repeater
- Using the Alarm as a WiFi Repeater
- Using the Simple Alarm
- Using the Door/Window Sensors
- Controlling System Sounds
- Motion Settings/Motion Zone Settings
- Quiet Hours Settings
- Sharing Access to your SwamCam
- Premium Subscription Features
- Rename or Delete SwamCam
- Mobile App Password Reset
- Resetting the SwamCam Hardware
- Mounting Tips
- Periodic Testing
Registering a SwamCam Account
- Download the SwamCam app from Apple app store or Google Play store by searching “SwamCam”
- Grant all requested permissions from the app or the system cannot be setup. If you decline any requests you will not be able to properly setup the SwamCam.
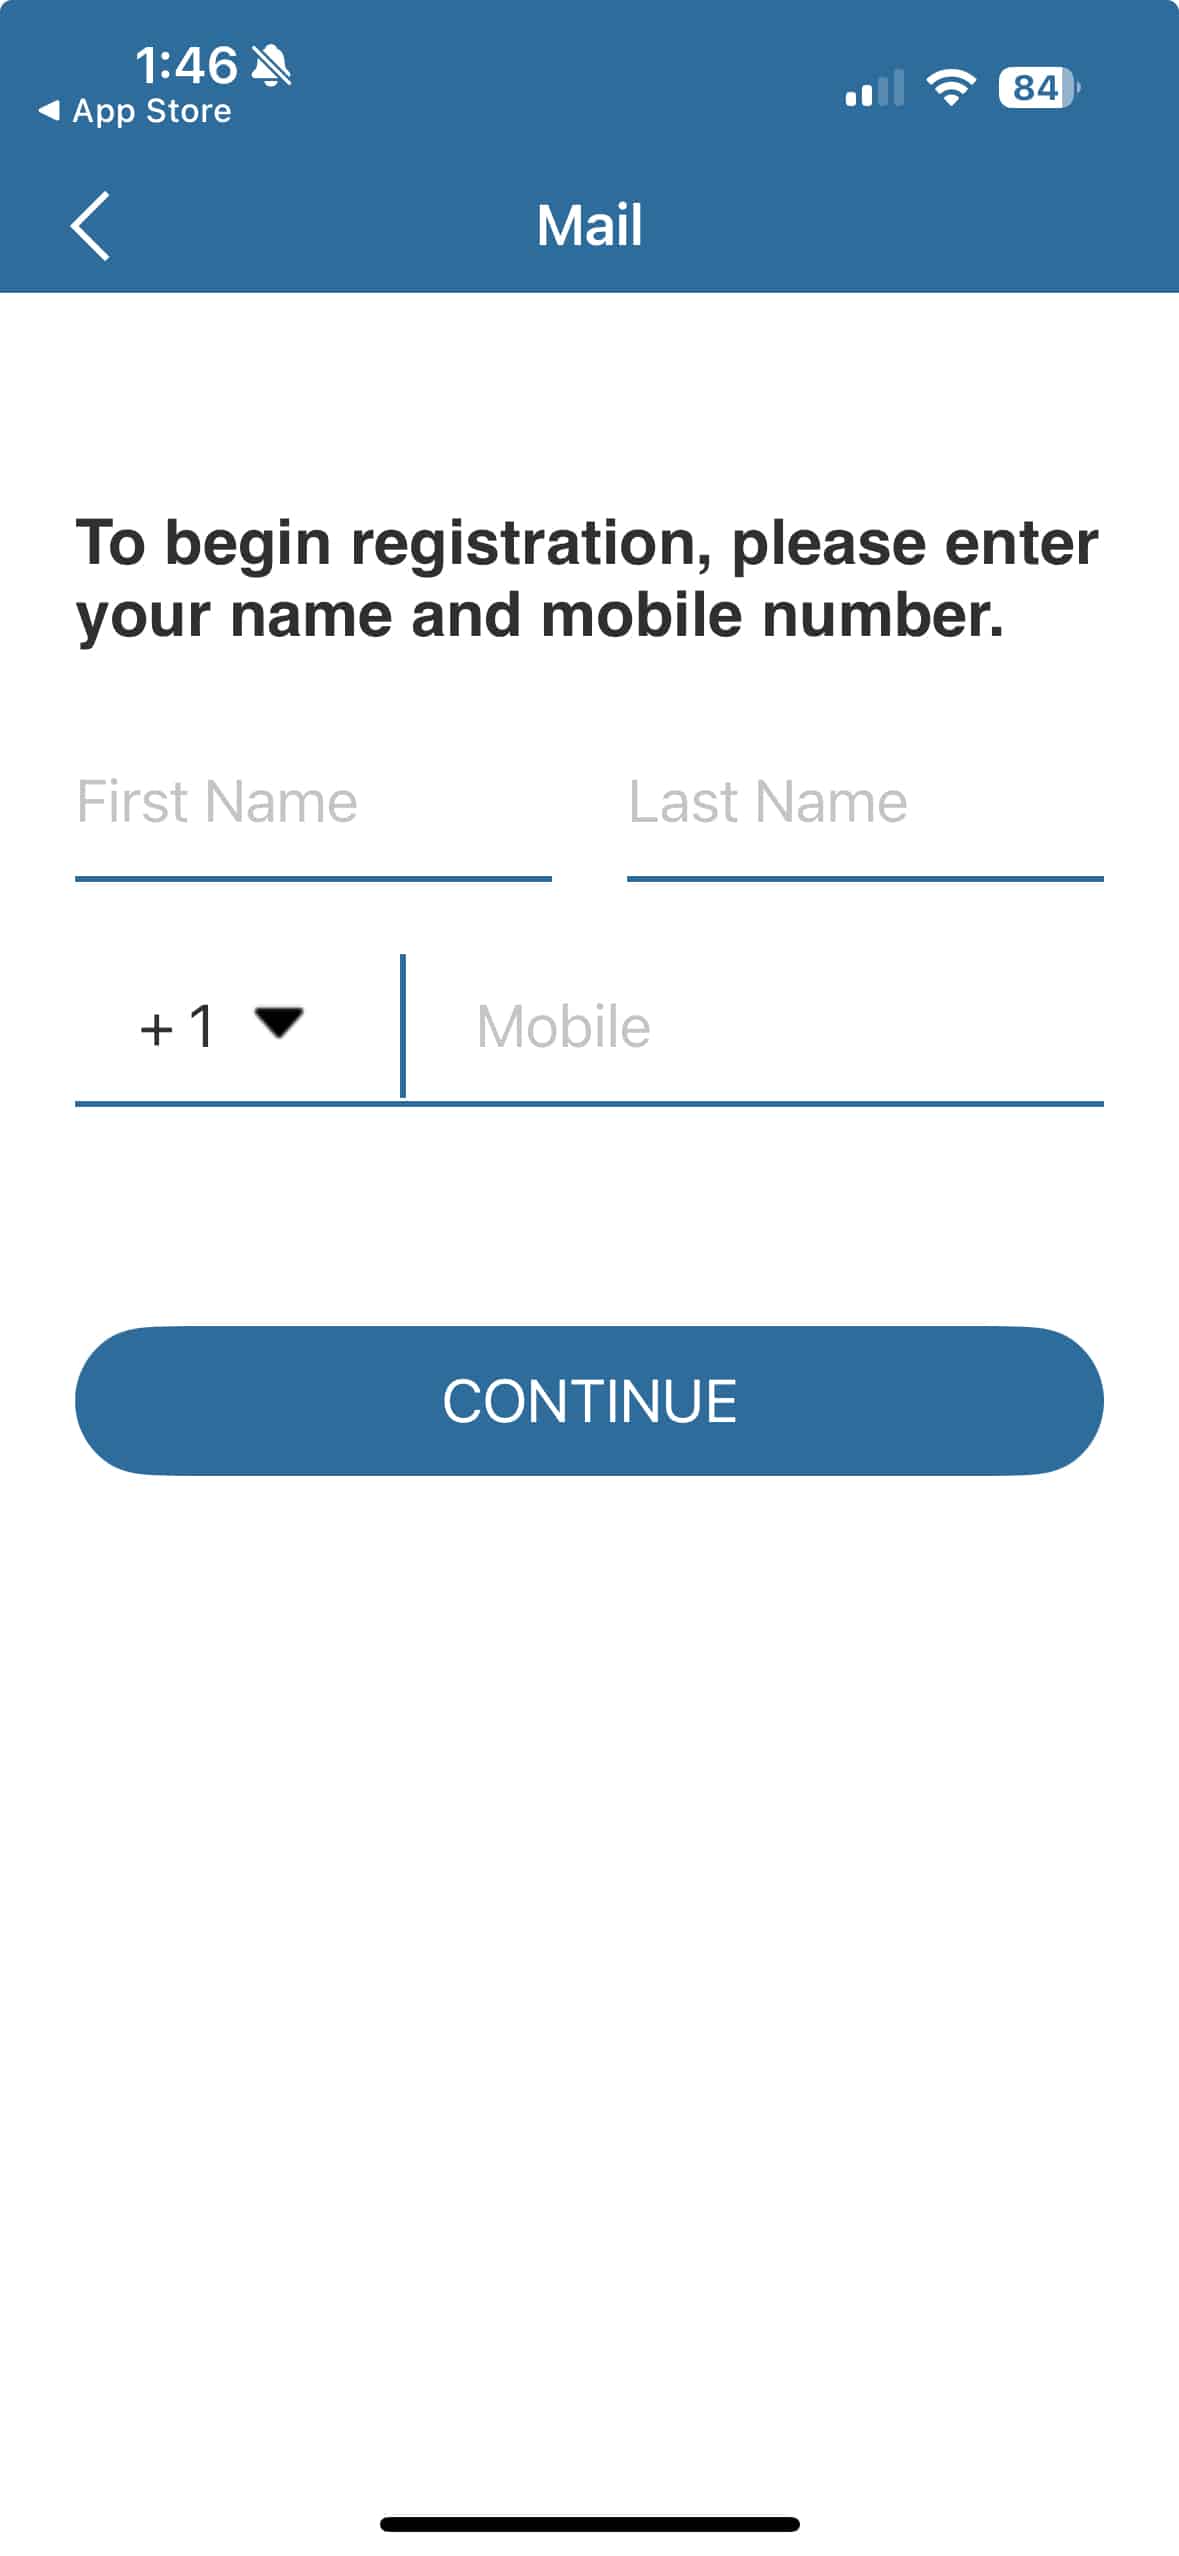
- Register an account by tapping “register”.
- Enter your name and mobile number.
- Enter your email address to register an account. You must provide a valid email address. A verification code will then be sent to that email account.
- Please check your email and retrieve the verification code, then enter a new password you want to use for this app. If you did not receive the verification code, please check your spam folder.
- Create a password. Please note the password requirements. After completing these steps, tap “register” to finish registering.

Adding Camera to iOS
- Please bring all the components indoors near your router or if using a mesh network, the node closest to the pool.
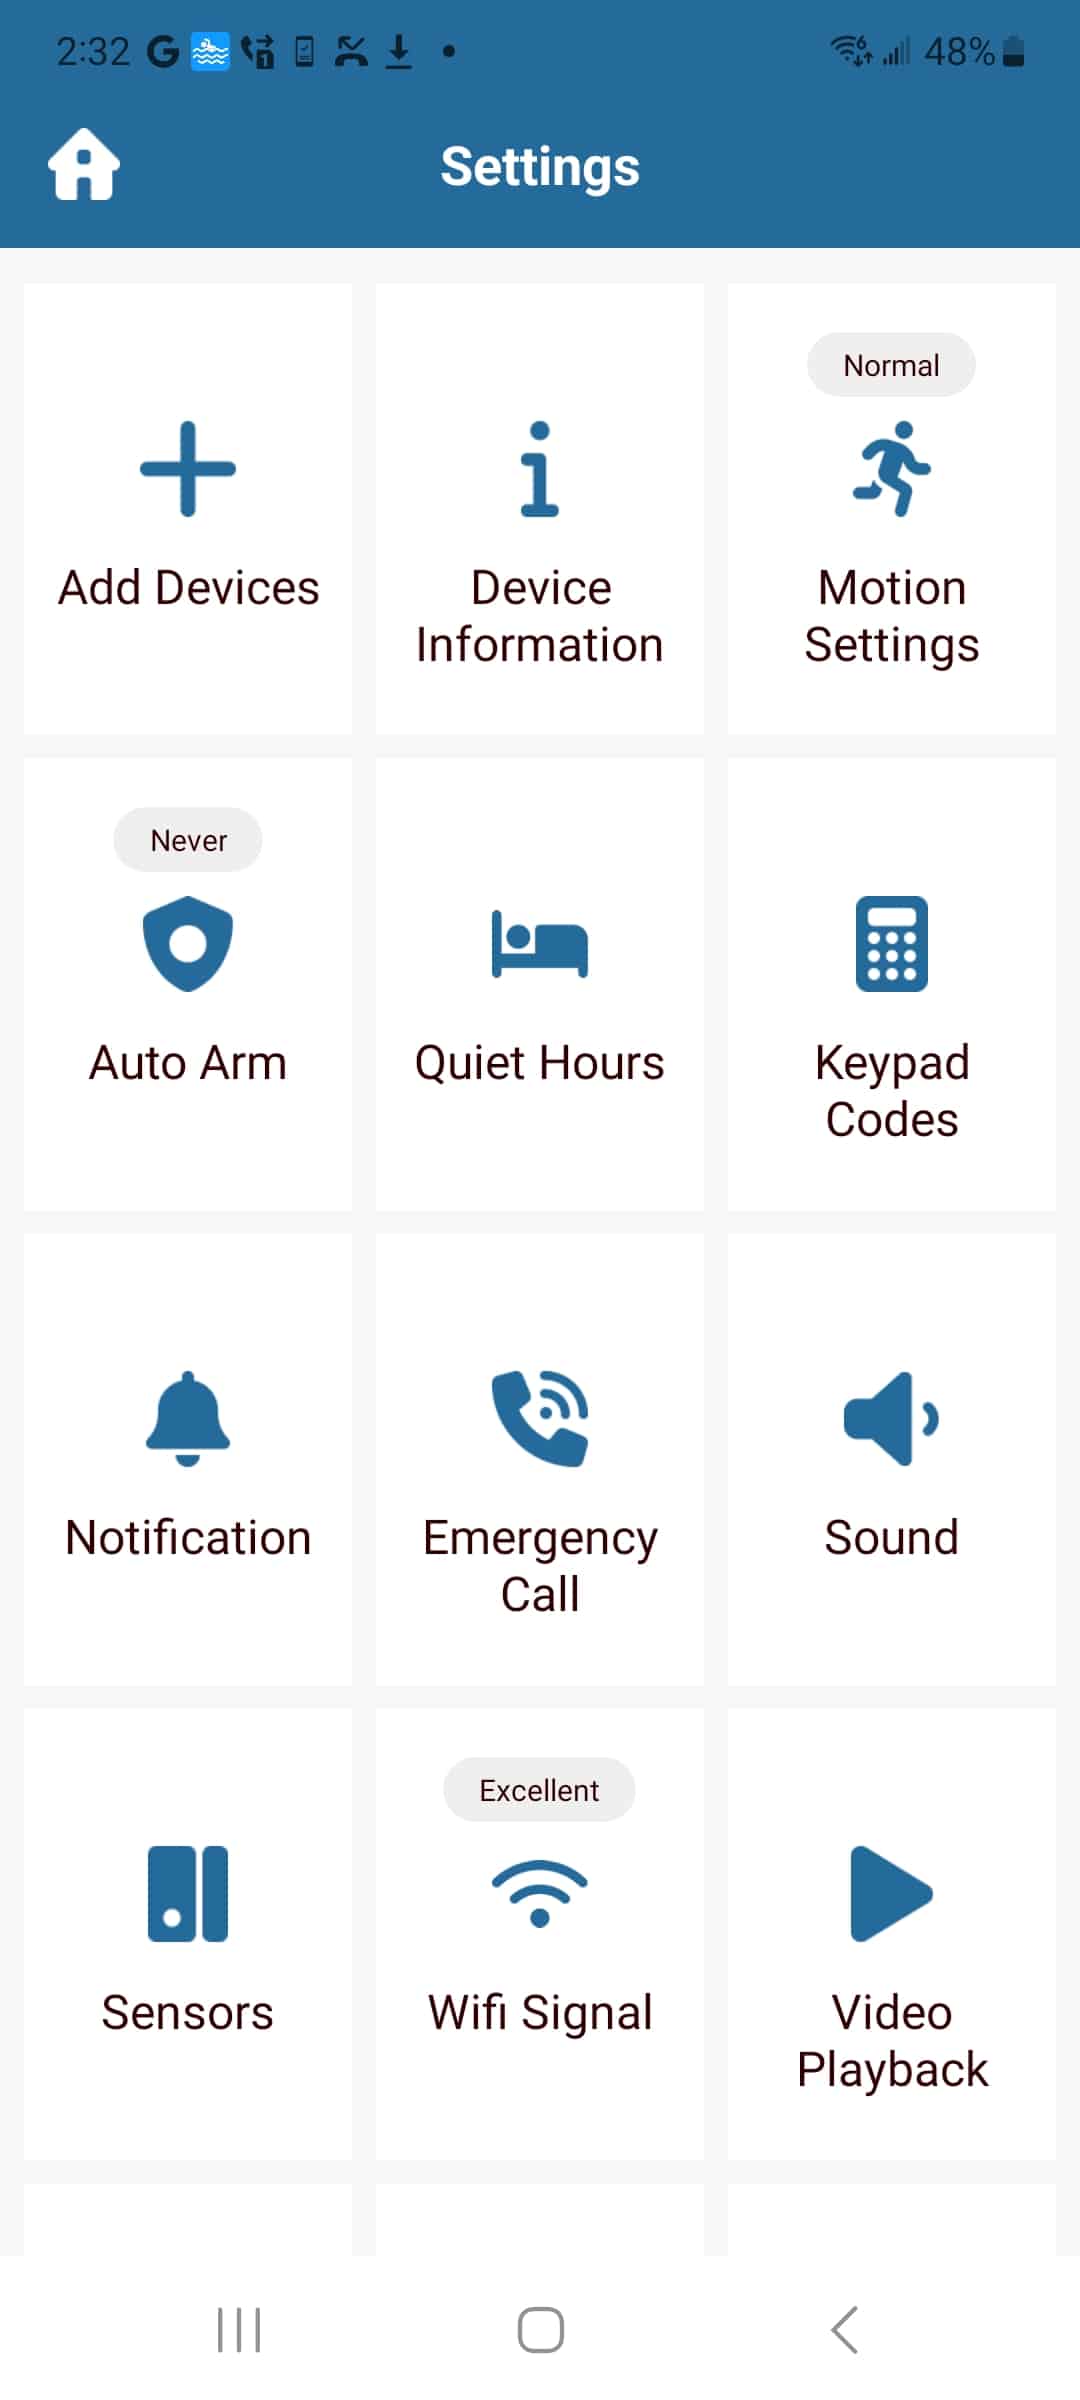
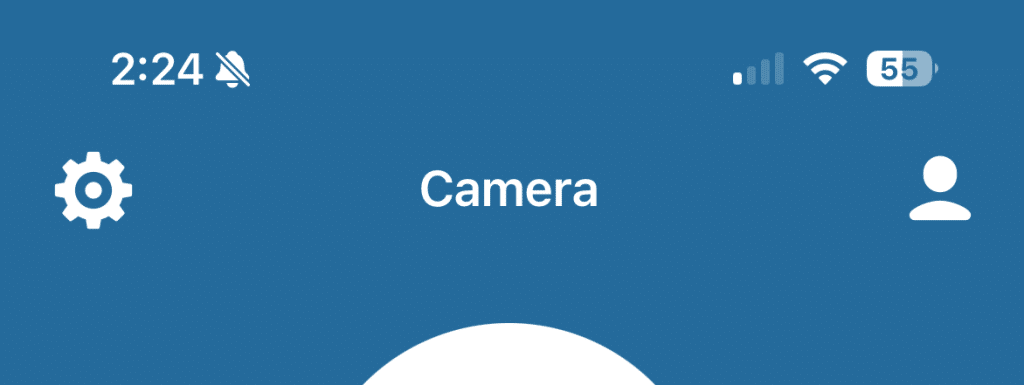
- After registration, you can add devices by tapping “settings” in the upper left corner, then tapping “+ add devices”.
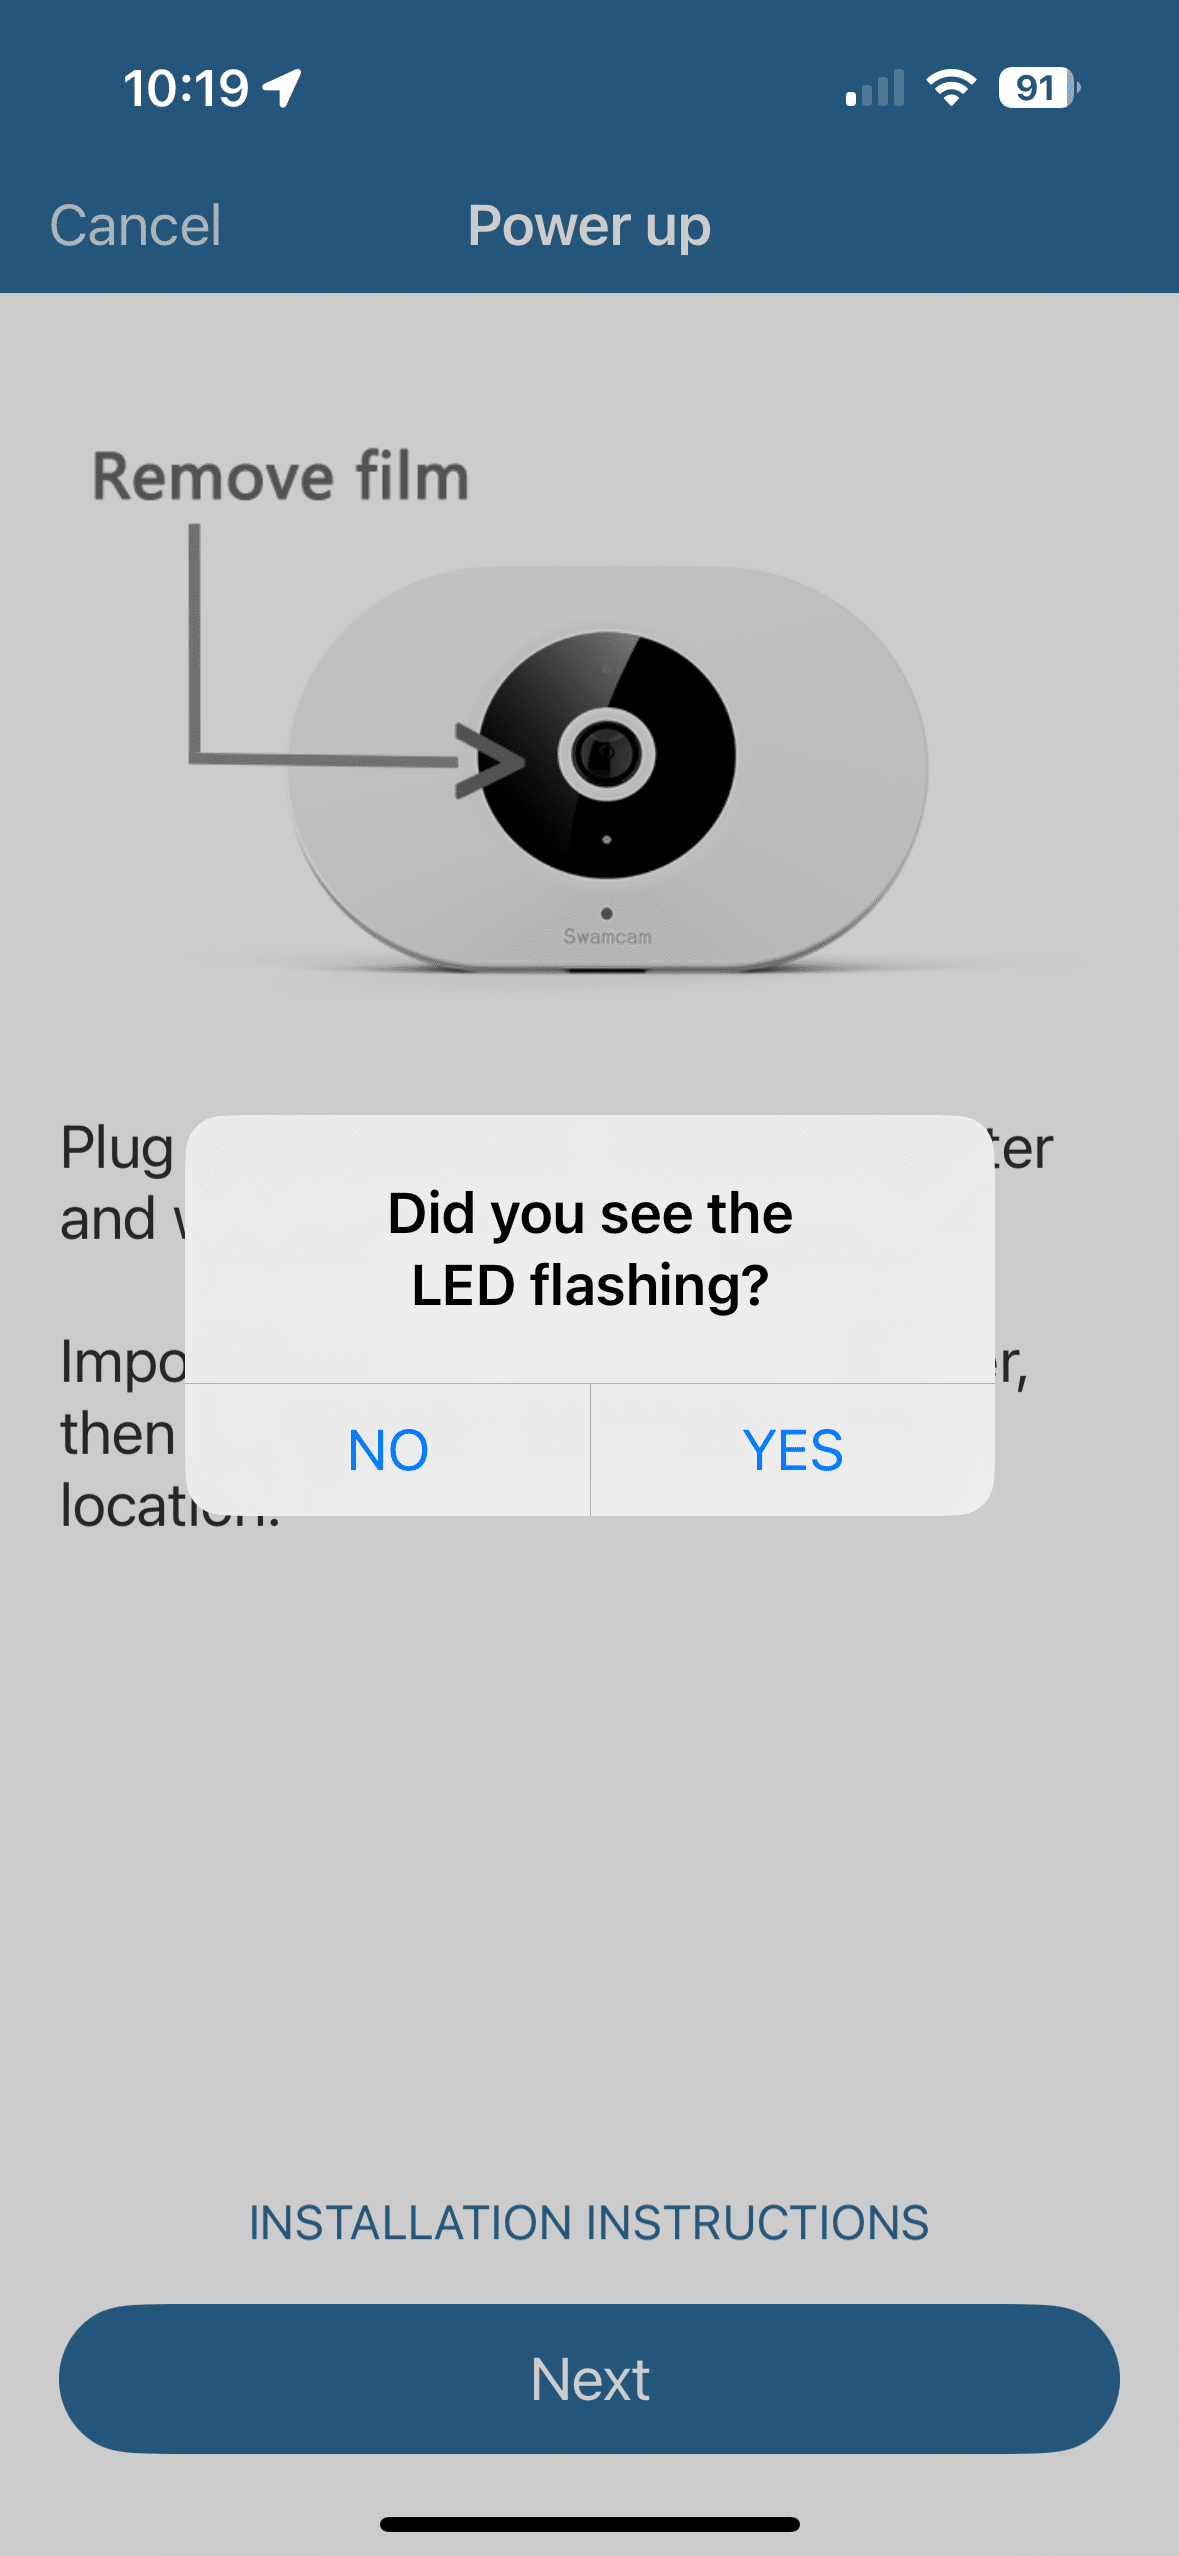
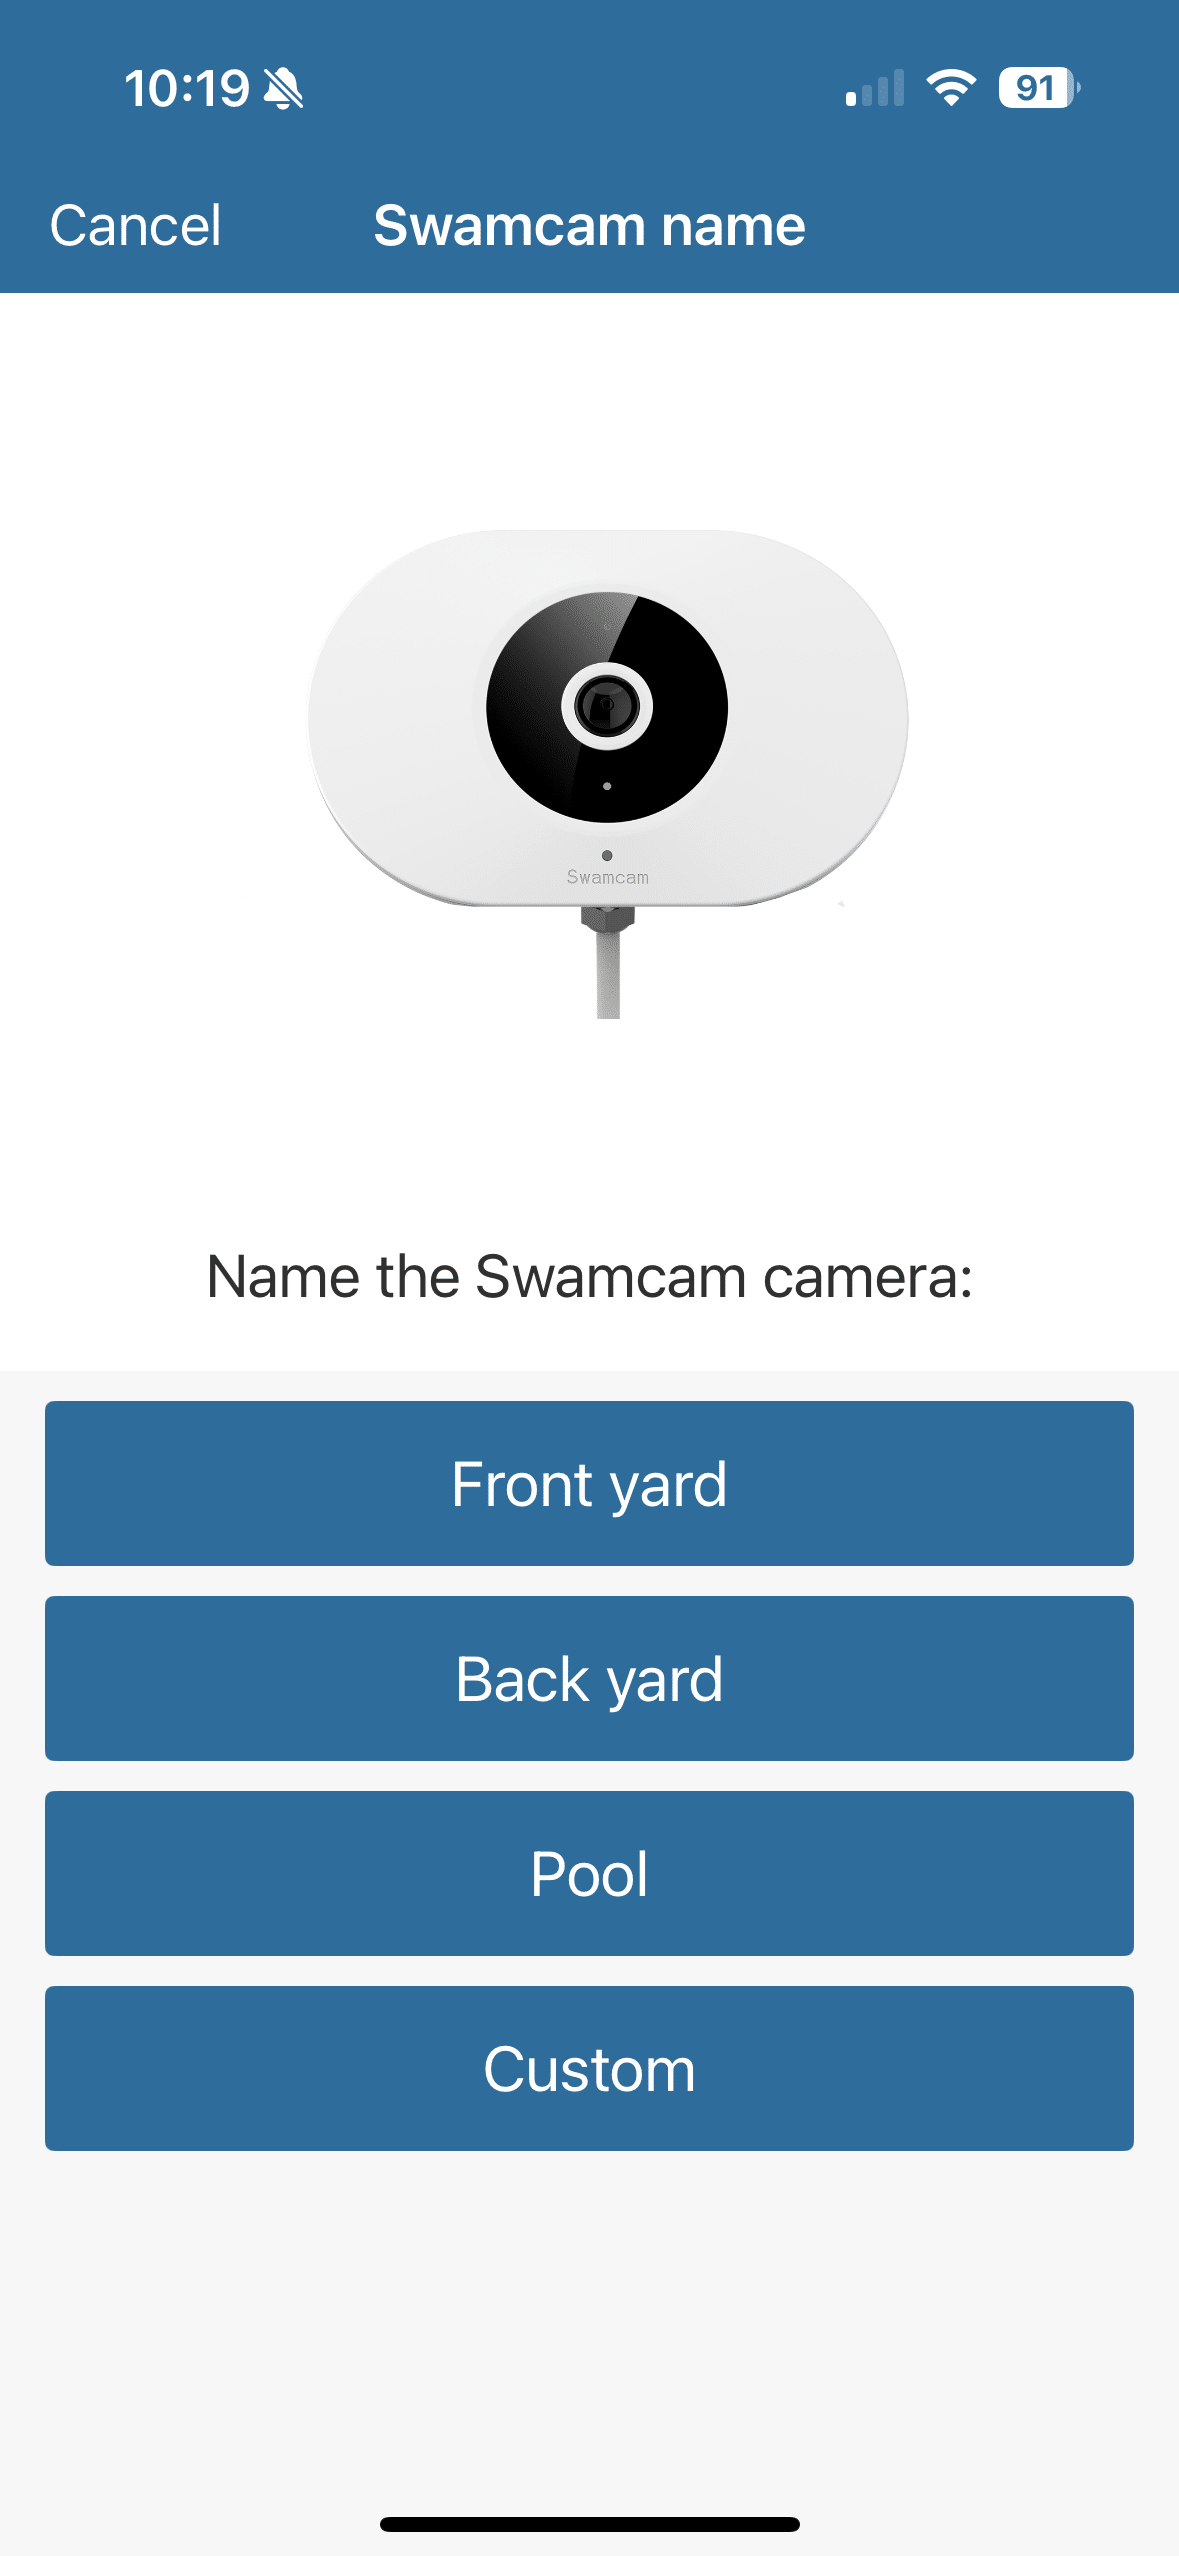
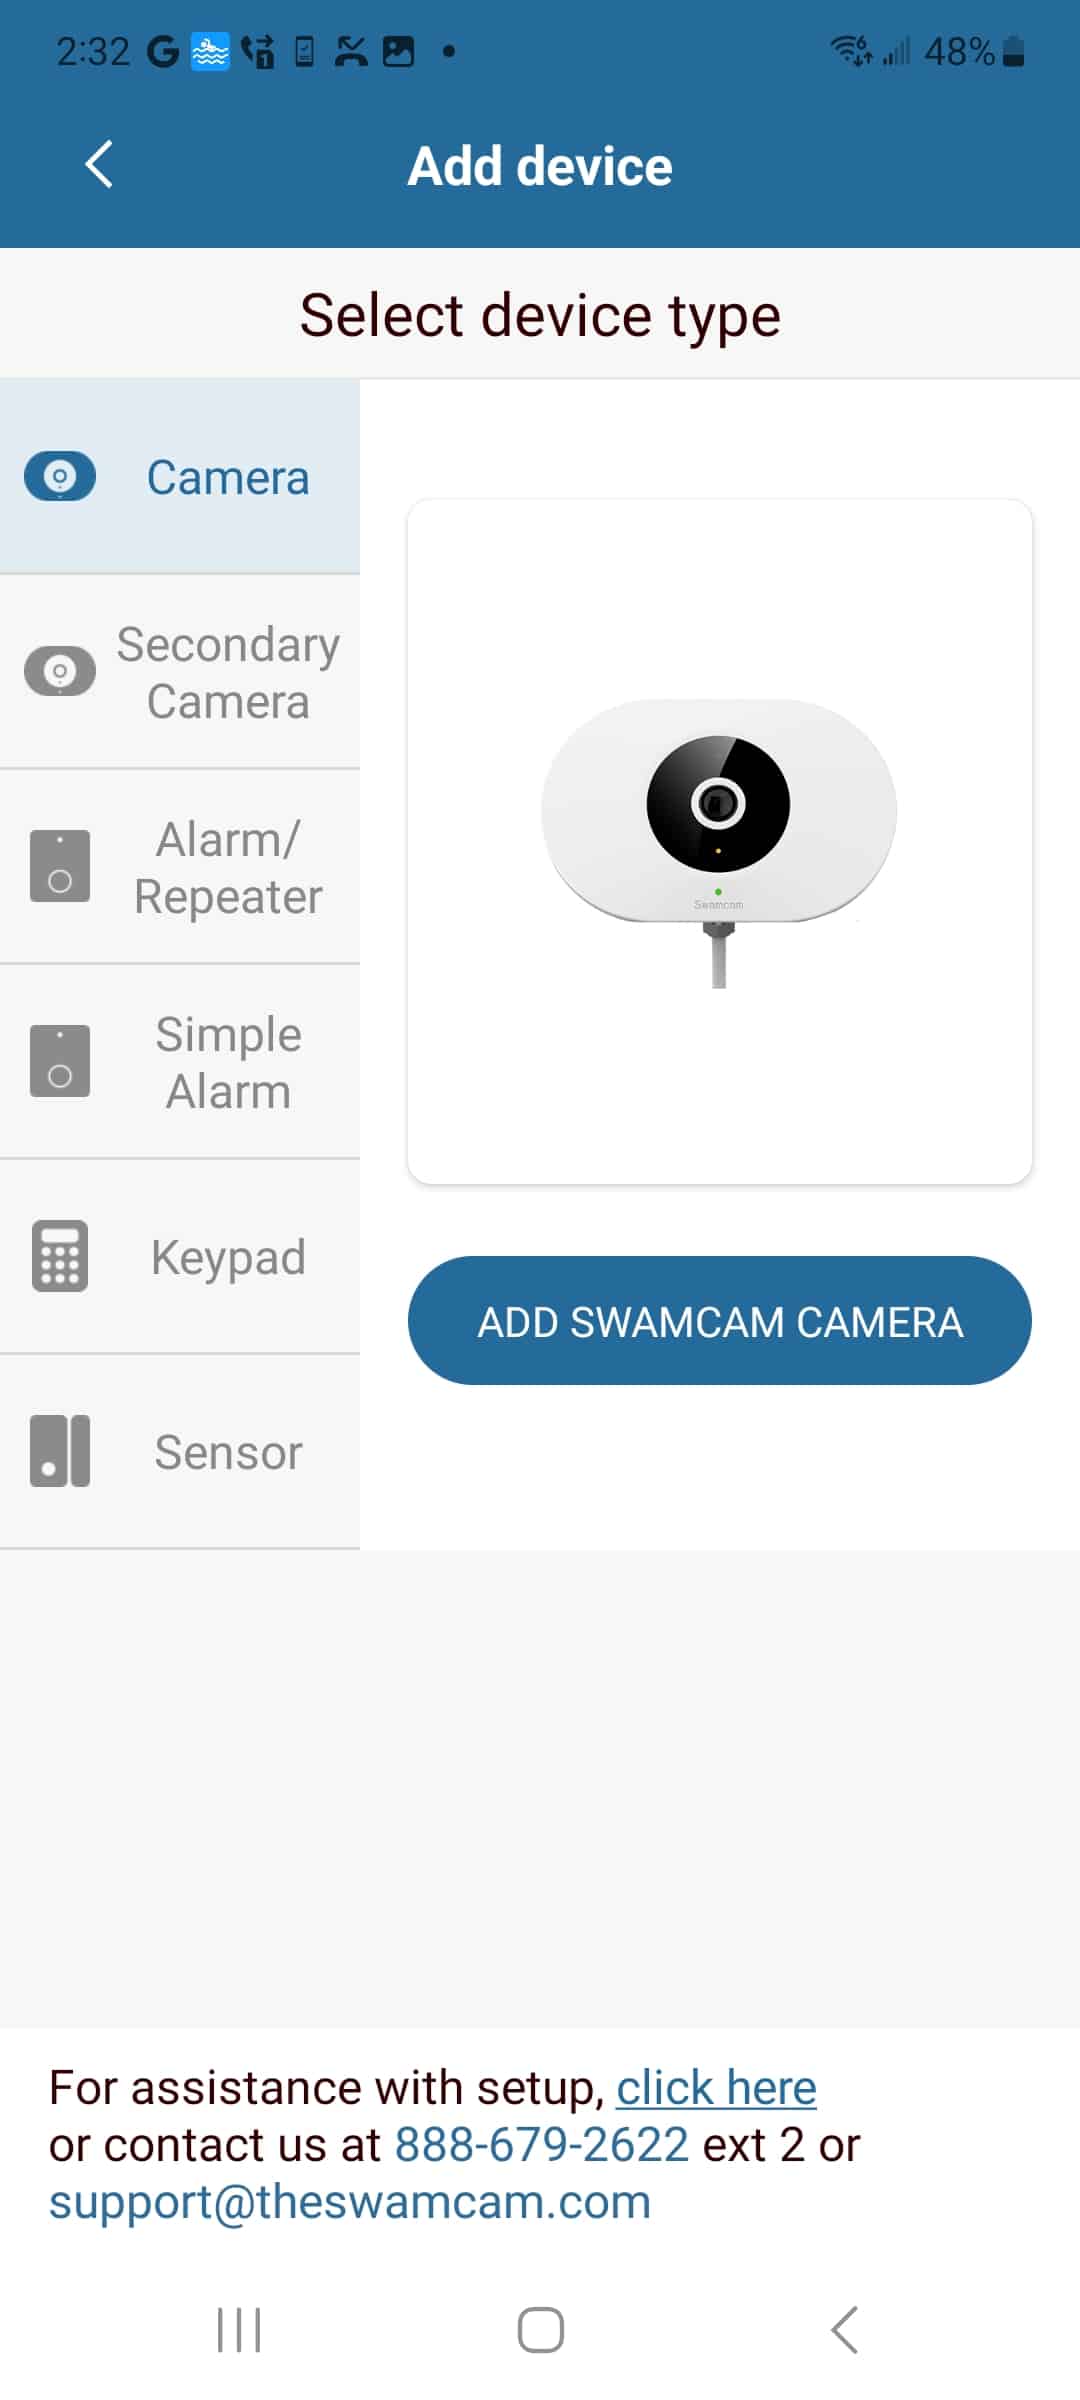
- Choose “add camera” on the left then tap add Camera in the blue bar. The camera LED will be flashing and you should hear the voice prompt of “SwamCam is ready for setup”. If not, the camera may not be properly reset. You can insert a paperclip into the pinhole on the camera’s left side and have it reset. Push and hold the paperclip until you hear the voice prompts.
- Respond to the question on-screen. If the LEDs are flashing green to red, select “yes”. If they are not, select “no”. You will be provided with reset instructions if the LEDs are not flashing.
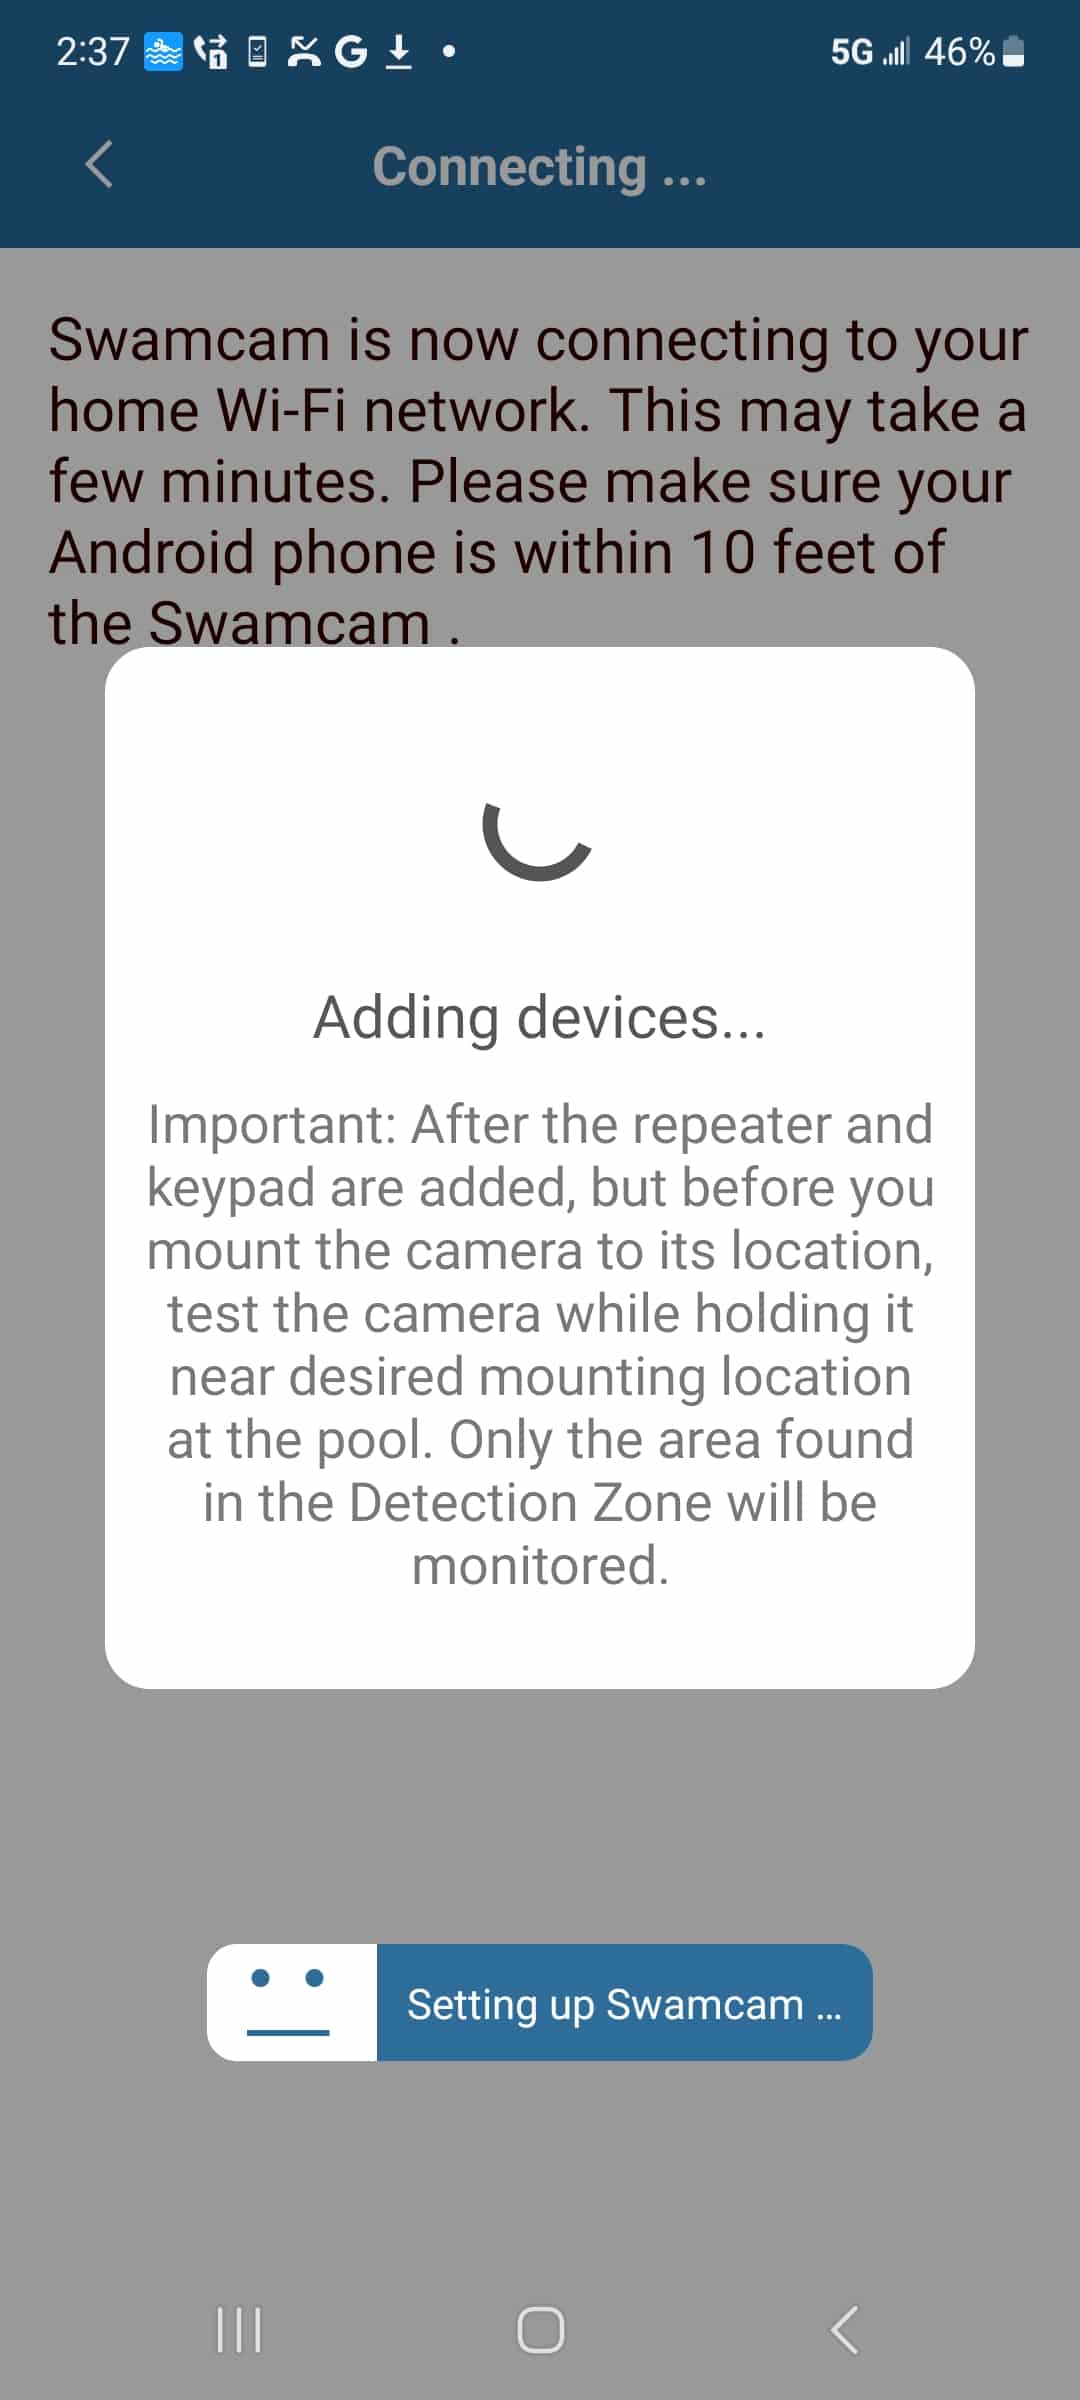
- After naming your device, you will be prompted to enter your existing Wi-Fi password: Please be advised that while the SwamCam Camera works on 5GHz and 2.4GHz Wi-Fi the alarm/repeater only supports 2.4GHz Wi-Fi network. If you purchased a system with a repeater, please make sure you are connecting to the 2.4GHz Wi-Fi. If you are using a blended 5GHz and 2.4GHz network, the system should automatically choose the 2.4GHz. If you are having difficulty, please contact support.
- Tap “join” to continue the connection. If you decline permission you will not be able to setup the system. If it asks about “No Internet Connection” tap always or this time only.
- After successfully adding the camera, you should see the name of the camera and the status on the homepage, online or offline. As a quick test, you can tap “live view” from the opening page to see if it works. If it was added successfully, we can now add the remaining components. Please be sure to check settings>firmware and apply any necessary updates.
Adding Camera to Android OS
- Please bring all the components indoors near your router or if using a mesh network, the node closest to the pool.
- Download the SwamCam app from the Google Play store.
- After registration, you can add devices by tapping “settings” in the upper left corner, then tapping “+ add devices”.
- Choose “add camera” on the left then tap add Camera in the blue bar. The camera LED will be flashing and you should hear the voice prompt of “SwamCam is ready for setup”. If not, the camera may not be properly reset. You can insert a paperclip into the pinhole on the camera’s left side and have it reset. Push and hold the paperclip until you hear the voice prompts.
- Respond to the question on-screen. If the LEDs are flashing green to red, select “yes”. If they are not, select “no”. You will be provided with reset instructions if the LEDs are not flashing.
- You will then be prompted to connect the camera to your Wi-Fi. Click “next” at the bottom of the screen.
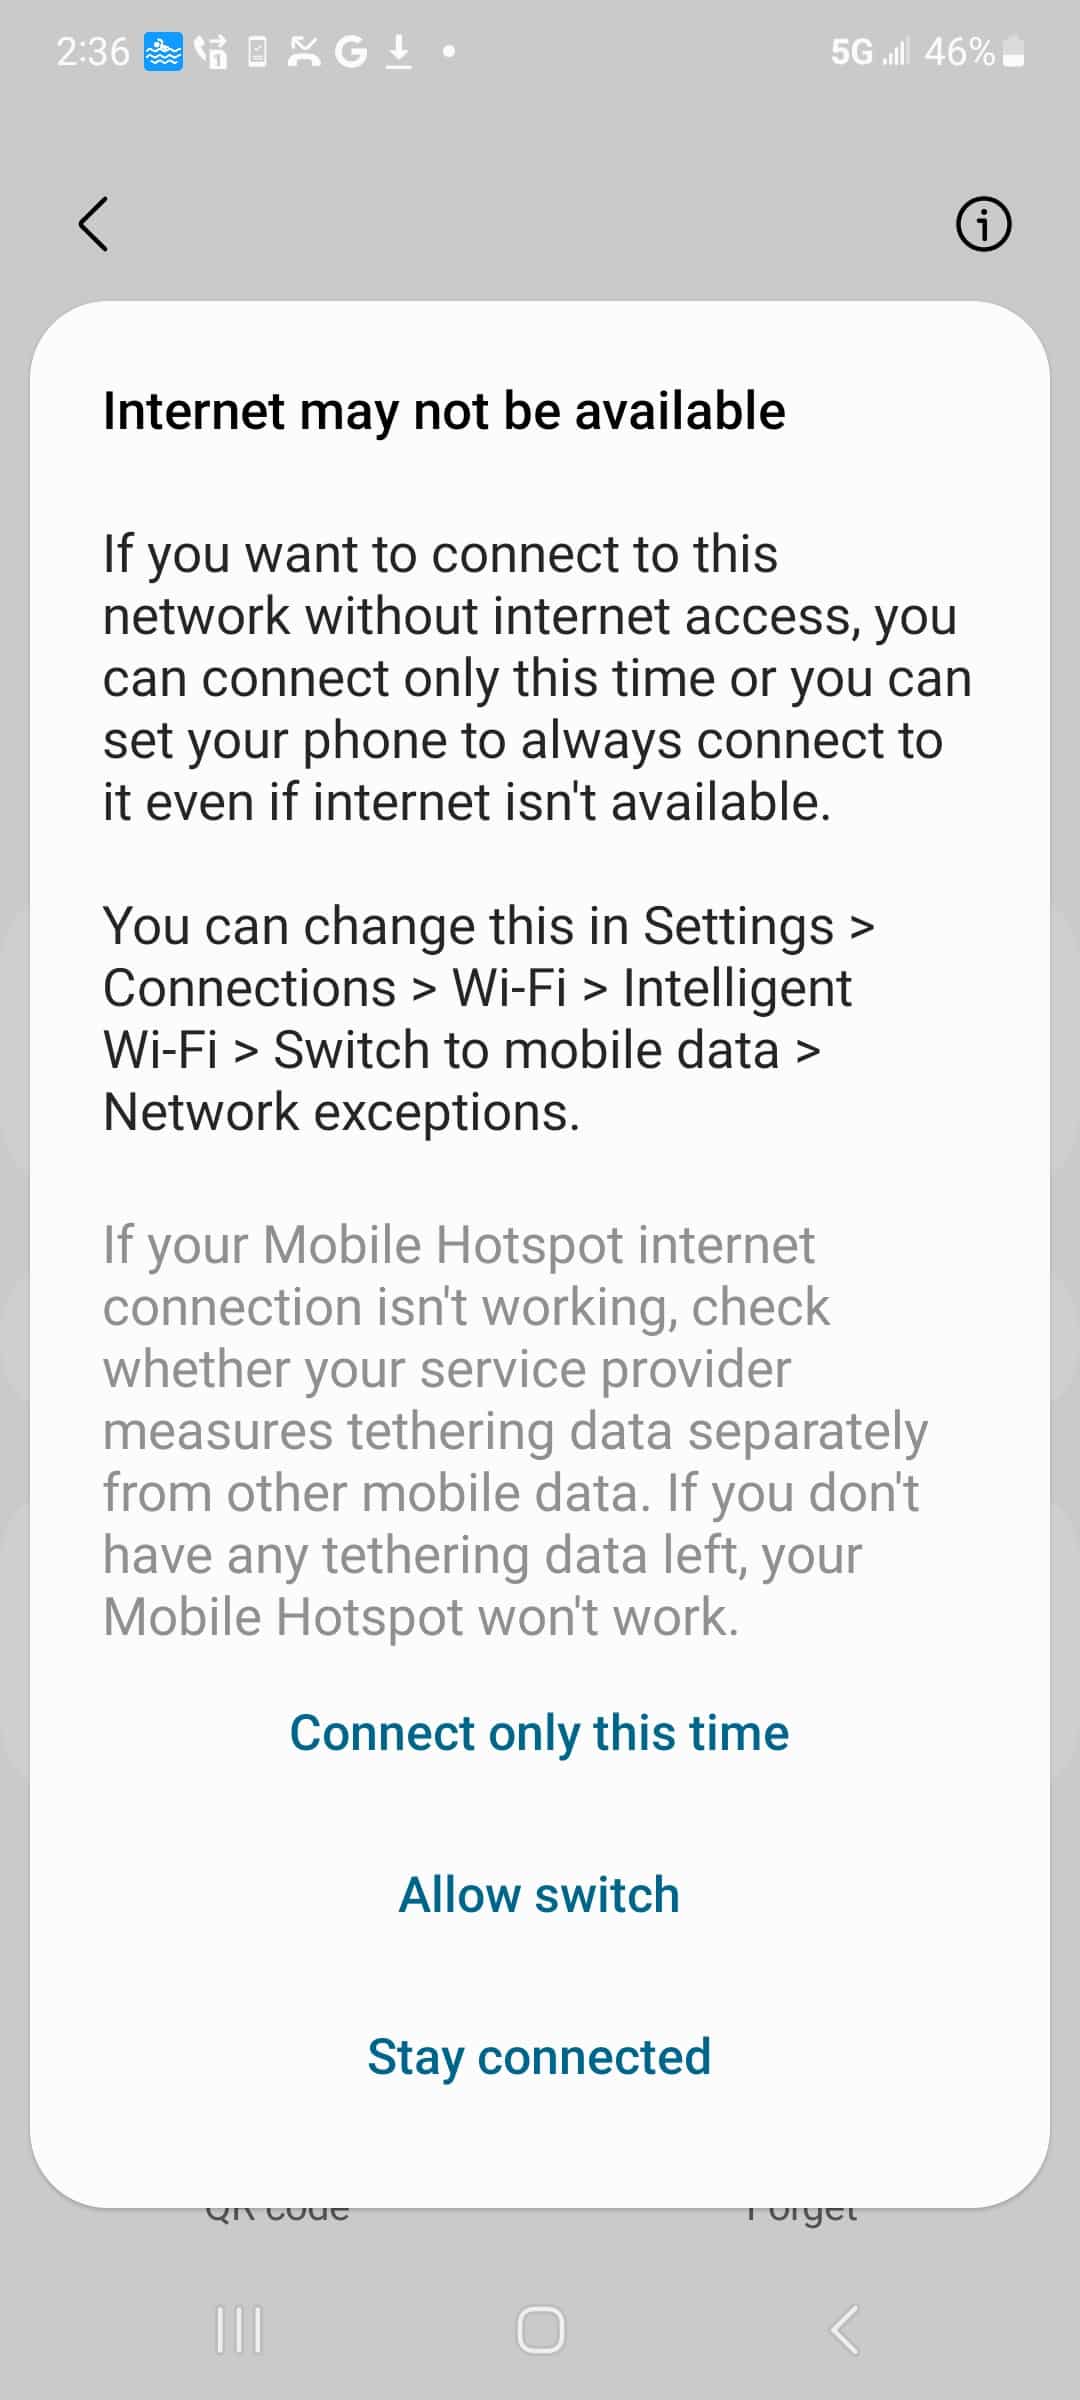
- Note: For some phones, after connecting to SwamCam, you must wait to see the small window pop-up on the top “Wi-Fi has no internet access, tap for options”. If you did not notice the window after a while, slide your screen from top to bottom. You should then see the pop-up on your home screen. Choose “connect this time only” to stay connected.
- On some of the Android phones (like Samsung), the app could prompt you to ignore the pop-up window: Then ignore the pop-up, and continue. Click OK.
- You will then see the android Wi-Fi connection page. Select “SwamCam” to join the camera’s internal network.
- After joining the SwamCam network, scroll down and tap NEXT at the bottom.
- You can now enter your home network WiFi password. Enter the password twice and tap Add device
- SwamCam will then attempt to join your network. If the password was entered correctly, the SwamCam will reboot and announce it has been connected to your network.
- Once connected you will see your system setup on the main page. You can tap “live view” to test. Please be sure to check settings>firmware and apply any necessary updates.
Adding Components to a Camera-Based System
There are multiple components for the SwamCam Drowning Prevention System. You should choose the proper device from the settings>add devices page
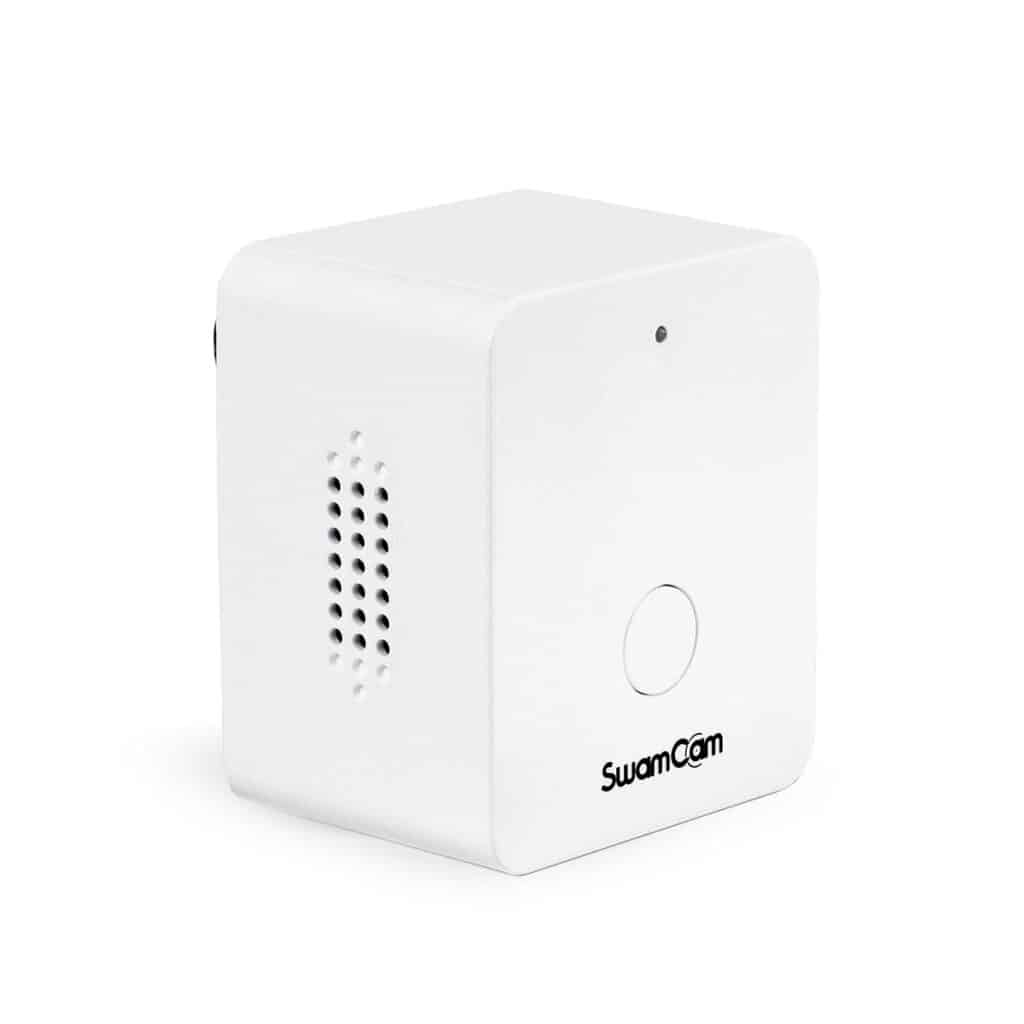
Alarm/Repeater
- Add the alarm/repeater by tapping “alarm/repeater” from the add devices section. Then tap add alarm/repeater in the blue bar.
- Choose the camera system you want to have the alarm/repeater connected to. If you only have one camera, then there is only one option. Tap the “>” arrow to continue.
- Scan or input the QR code located on the back of the repeater, but do not tap ADD. Once scanned, plug in the repeater near your camera. Once the repeater boots up (voice prompts are heard) then tap ADD then NEXT. The app will notify you when the setup is complete.
- Test the alarm/repeater by arming and disarming the system, it should mimic the prompts of the camera.
- The LED should be OFF when connected properly and ON when there is a problem with the Wi-Fi connection. Please be sure to check settings>firmware and apply any necessary updates.
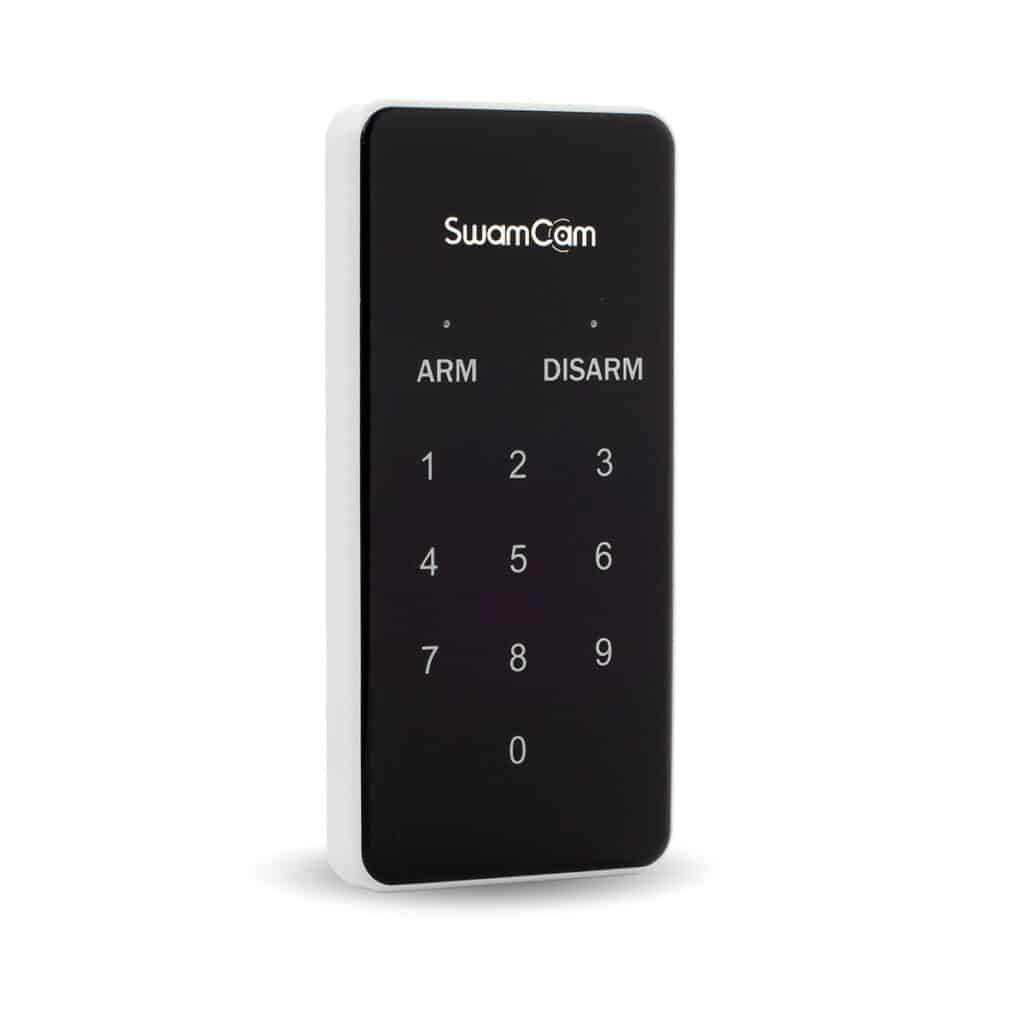
Keypad
- Place two new AAA batteries into the keypad battery compartment located on the top back of the device.
- Add the keypad by tapping “keypad” from the add devices section then tap add Keypad in the blue bar.
- Choose the camera system you want to have the keypad connected to. If you only have one camera, then there is only one option. Tap the “>” arrow to continue.
- Scan or input the QR code located on the back of the keypad, but do not tap ADD. Once scanned, tap any key on the keypad to “wake it up” (The keypad goes to sleep to save battery power).
- With the keypad screen lit up blue tap, add on the app, then next and the keypad will add to your system.
- Test the keypad with the default code after adding, 1234arm/1234disarm. It may take a few tries to get the keypad synced to the system. It should arm and disarm the SwamCam system accordingly. You can also check settings>device information to see if the components are added properly.
Simple Alarm
- Add the simple alarm by tapping “simple alarm” from the add devices section, then tap add Simple Alarm in the blue bar.
- Choose the camera system you want to have the simple alarm connected to. If you only have one camera, then there is only one option. Tap the “>” arrow to continue.
- Scan or input the QR code located on the back of the simple alarm, but do not tap ADD. Once scanned, plug in the alarm near your camera. Once the alarm boots up (voice prompts are heard) then tap ADD. The alarm will notify you when the setup is complete.
- Test the alarm by arming and disarming the system, it should mimic the prompts of the camera.
- The LED should be OFF when connected properly.
Secondary Camera
- Plug in the secondary camera near the primary camera, allow it to boot fully.
- Add the secondary camera by tapping “secondary camera” from the add devices section.
- Choose the camera system you want to have the secondary camera connected to. If you only have one camera, then there is only one option. Tap the “>” arrow to continue.
- Scan or input the QR code located on the top of the secondary camera. The secondary camera will notify you when the setup is complete.
- Test the secondary camera by arming and disarming the system, it should mimic the prompts of the camera as well as provide a live view. Please be sure to check settings>firmware and apply any necessary updates.
- Be sure to check the motion settings for the secondary camera as they are separate from the primary camera.
Door/Window Sensors
- Using the supplied screwdriver, open the sensor housing. Depress the safety spring and place it under a cr2 battery the main sensor housing. Close the sensor housing and replace the screws (careful not to over tighten). The LED will blink red/green to indicate it is in setup mode.
- Add the sensor by tapping “sensor” from the add devices section.
- Then choose the camera system you want to have the sensor connected to. If you only have one camera, then there is only one option. Tap the “>” arrow to continue.
- Scan or input the QR code located on the back of the sensor. The LED should be off when connected properly.
- Test the sensor by closing and opening (separating it from the magnet side), it should set off an audible alarm as well as send a push notification to your mobile device.
- Be sure to check the settings for the sensor to customize its usage.
Live View
Understanding the Live View Screen
From the live view screen, you can do the following:
You can make an emergency call directly from the live view screen. Simply tap the “emergency call icon” on the top left corner of the screen and you will be prompted to dial 911. If you are a premium subscriber you can program a custom emergency dial as well as 911 for quick access (see premium features).

Tapping the X in live view will bring you back to the homepage of the app.

The microphone allows you to talk to people close to the camera. The default state of the microphone when launching live view is muted (grey). Tap the icon and it will turn blue to indicate it is un-muted and you can now speak to people near the camera.


The speaker allows you to hear what’s going on near the camera. The default state of the speaker when launching the live view is muted (grey). Tap the icon and it will turn blue to indicate it is un-muted and you will be able to hear sound from the camera.


The bell allows you to manually activate and deactivate the siren. Blue icon means the siren is active and grey icon means it deactivated.


(Premium Feature) The manual record button can be used if you subscribe to our premium service to manually record what you are watching on the live view screen at that moment. It stores the videos in your phone storage and they are cataloged under settings>video playback.

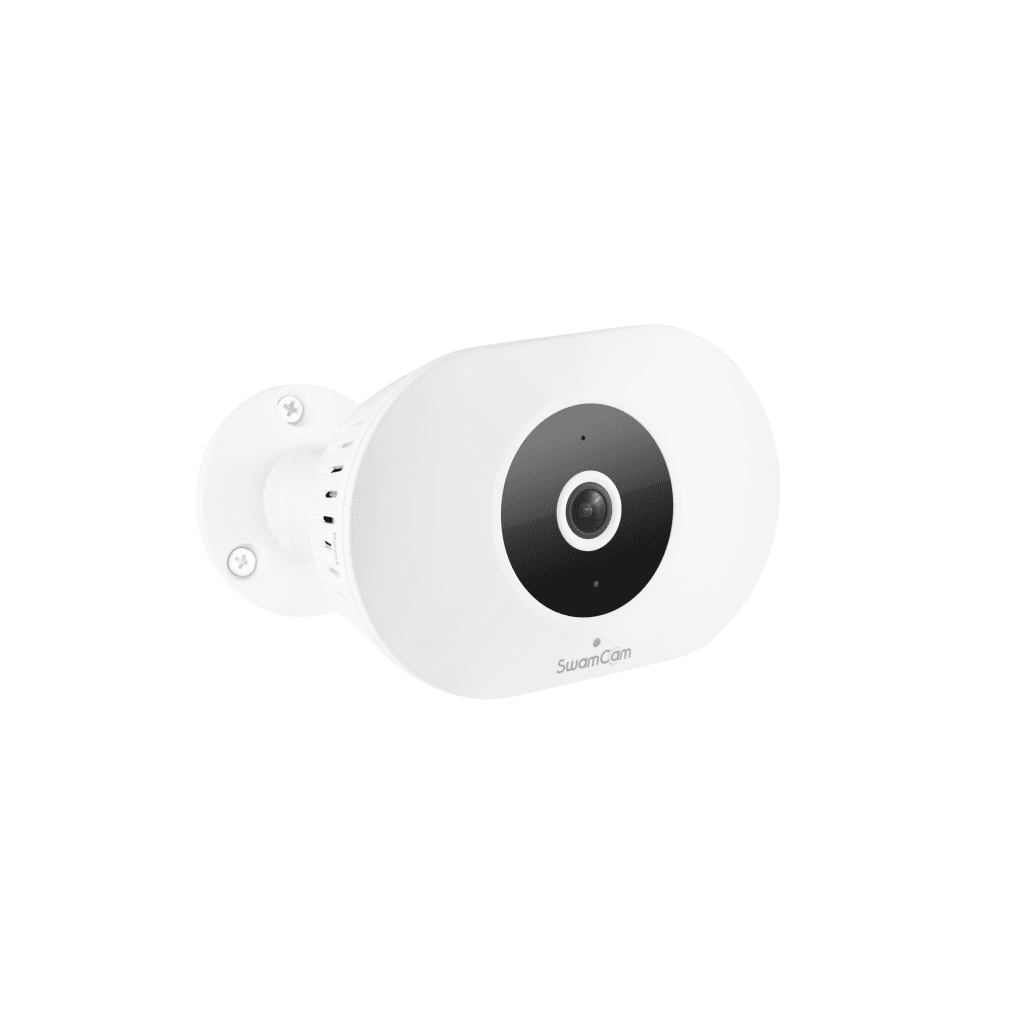
Understanding the SwamCam Camera
The SwamCam Camera LED light will indicate the status of the camera.
LED Color
Red
Green
Flashing Amber
Flashing Red/Green
Camera Status
Armed
Disarmed
Alerting
Setup Mode
The black ring around the camera lens contains 8 red IR LEDs for night vision support. They should be illuminated in the dark.
note: If the nighttime illumination is insufficient, we recommend providing additional light sources, such as motion sensor lights or landscape lighting.
Using the SwamCam Dual Camera
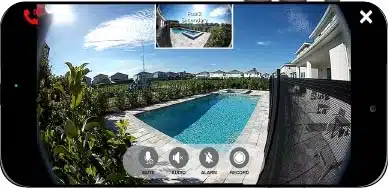
If two cameras are setup in one system, you can view them both from the live view screen.
Both your cameras will be listed on the Home Screen as Primary and Secondary. When you select live view on either, you will be brought to a live view that contains a thumbnail of the other camera’s view.
Simply tap the other view to toggle between live views.
Arming one camera will arm both. This dual camera setup allows both cameras to work in one ecosystem.
Keypad Functions
The Keypad can be placed indoors or out. It can be used for when a pool service crew enters the pool area for routine maintenance and you would like them to disarm the system in order to avoid false alarms. You could place it indoors at the back door the pool in case you or other home residents with the code wanted to enter the pool area without accessing your mobile device or smart watch.
The default keypad code is 1234. You may program any 4-digit code you prefer.
The keypad will show the system state after you wake it up and it completes polling the camera.
Arm will blink then it will show a steady LED on either DISARM or ARM, depending on the system state.
With a Premium Subscription you are able to program multiple custom codes for multiple individuals.
To properly use the keypad, you must type the code then tap arm or disarm.
Changing the Access Code
Go to settings>Keypad Codes
The Default code is 1234
You can set a custom code or if you forgot your code you can select reset code.
If you need to reset your keypad code you will receive a verification email to the registered account’s email address for security purposes.
Using the Alarm/Repeater
The SwamCam Alarm/Repeater should be setup indoors near the router or mesh node during the camera setup.
Once setup is complete, place the SwamCam Alarm/Repeater indoors where it can overlap your internal Wi-Fi signal, yet be as close to the camera as possible to provide useful Wi-Fi coverage in case it’s needed.
The camera will choose the better signal, your router or our repeater. The camera does not have to connect to the repeater WiFi.
The SwamCam Alarm/Repeater should mimic the ARM and DISARM prompts of the camera and issue alarms.
There is no volume control for the SwamCam Alarm. The ASTM F2208 certification requires it maintain a minimum 85dB volume.
The LED on the alarm/repeater will be off when the device is connected properly. It will be on when there is an issue with the Wi-Fi connection of the device.
VOICE MODE
You may toggle the Alarm between siren mode and voice mode.
Voice mode will issue an audible alert when someone is detected near the pool area using a human voice, rather than an alarm tone.
You can enable voice mode by pressing and holding the button on the front of the Alarm for 5 seconds until you hear the prompt “Voice Mode Enabled” or in settings>device information select alarm/repeater and toggle voice mode on and off.
MUTE
You may temporarily mute the alert emanating from the alarm by tapping the button on the front of the Alarm, as opposed to long press for mode toggle.
This will mute the current alert, but not subsequent alarms.
Using the Alarm as a WiFi Repeater
The SwamCam Camera will decide for itself if it needs the Wi-Fi from our Alarm/Repeater or if your router provides a better signal. Regardless, there will be a WiFi broadcast from the Alarm/Repeater that is accessible to any devices you choose.
The SwamCam Alarm/Repeater creates a separate network with the same name as your Wi-Fi SSID with a “B” at the end.
The B network password is the same as the original network password.
Using the Simple Alarm
The SwamCam Simple Alarm should be setup indoors near the router during the camera setup.
Once setup is complete place the SwamCam Simple Alarm indoors close to the camera OR if adding as an additional alarm further into the home, place the Simple Alarm within 50 feet of either the SwamCam Alarm/Repeater, a SwamCam Keypad or another Simple Alarm. The Simple
Alarms, Alarm/Repeater and the Keypad will “daisy-chain” their signals off each other.
The SwamCam Simple Alarm should mimic the ARM and DISARM prompts of the camera and issue alarms.
There is no volume control for the SwamCam Alarm. The ASTM F2208 certification requires it maintain a minimum 85dB volume.
The LED will be of OFF when the device is connected properly.
VOICE MODE
You may toggle the Alarm between siren mode and voice mode.
Voice mode will issue an audible alert when someone is detected near the pool area using a human voice, rather than an alarm tone.
You can enable voice mode by pressing and holding the button on the front of the Alarm for 5 seconds until you hear the prompt “Voice Mode Enabled” or in settings>device information select alarm/repeater and toggle voice mode on and off.
MUTE
You may temporarily mute the alert emanating from the alarm by tapping the button on the front of the Alarm, as opposed to long press for mode toggle.
This will mute the current alert, but not subsequent alarms.
DRAFT CONTENT
Using the Door/Window Sensors
The Door and Window Sensors must be paired to the app to set them up (see adding components). There is no method to permanently disable the sensors with the app. The Arm and Disarm feature of the camera does not affect the door/window sensors. If you wish to disable the sensors for more than 12 hours, you must remove them from their mounts and keep the sensor with the magnet or remove the battery entirely.
To temporarily disable the sensors you must enable Party Mode in the SwamCam App. Tap Settings>Sensors. You can enable Party Mode for any combination of minutes and hours up to 12 Hours. This will render the sensors temporarily inactive and will resume activity once the timer has completed.
Each sensor has a 5-second built-in delay from separation (1 inch or more) to alert.
If you do not close the sensor within 5 seconds of opening, an alarm will sound from the indoor alarms and camera.
To terminate the alarm, close the sensor and press the bypass button.
The bypass button located on each sensor delays the alarm for 14 seconds giving you ample time to exit the door without triggering an alert. Once the bypass button is pressed, the LED will display solid green for the duration of the bypass. If after 14 seconds the sensor is not closed, the LED will flash red and an alarm will sound from the camera and the inside alarm. To terminate the alarm, close the sensor and press the bypass button.
By design, the sensor has NO led when it is closed and working properly.
Sensor LED:
Flashing Red/Green – Ready for setup
Solid Green – 14 Second Bypass Pressed
1 Second Red Flash Every Minute– Sensor Battery Low
Constant Flashing Red – Sensor Open/Alert
Solid Amber – Sensor Open (Within 5 Second Delay)
Controlling System Sounds
In settings>sound you can adjust the volume of the camera alert and voice prompts. If you are a Premium subscriber, you can upload custom siren tones for the camera.
Please note there is no volume control for the Alarm/Repeater or Simple Alarm. The volume needs to be 85 decibels or higher to maintain ASTM F2208 certification.
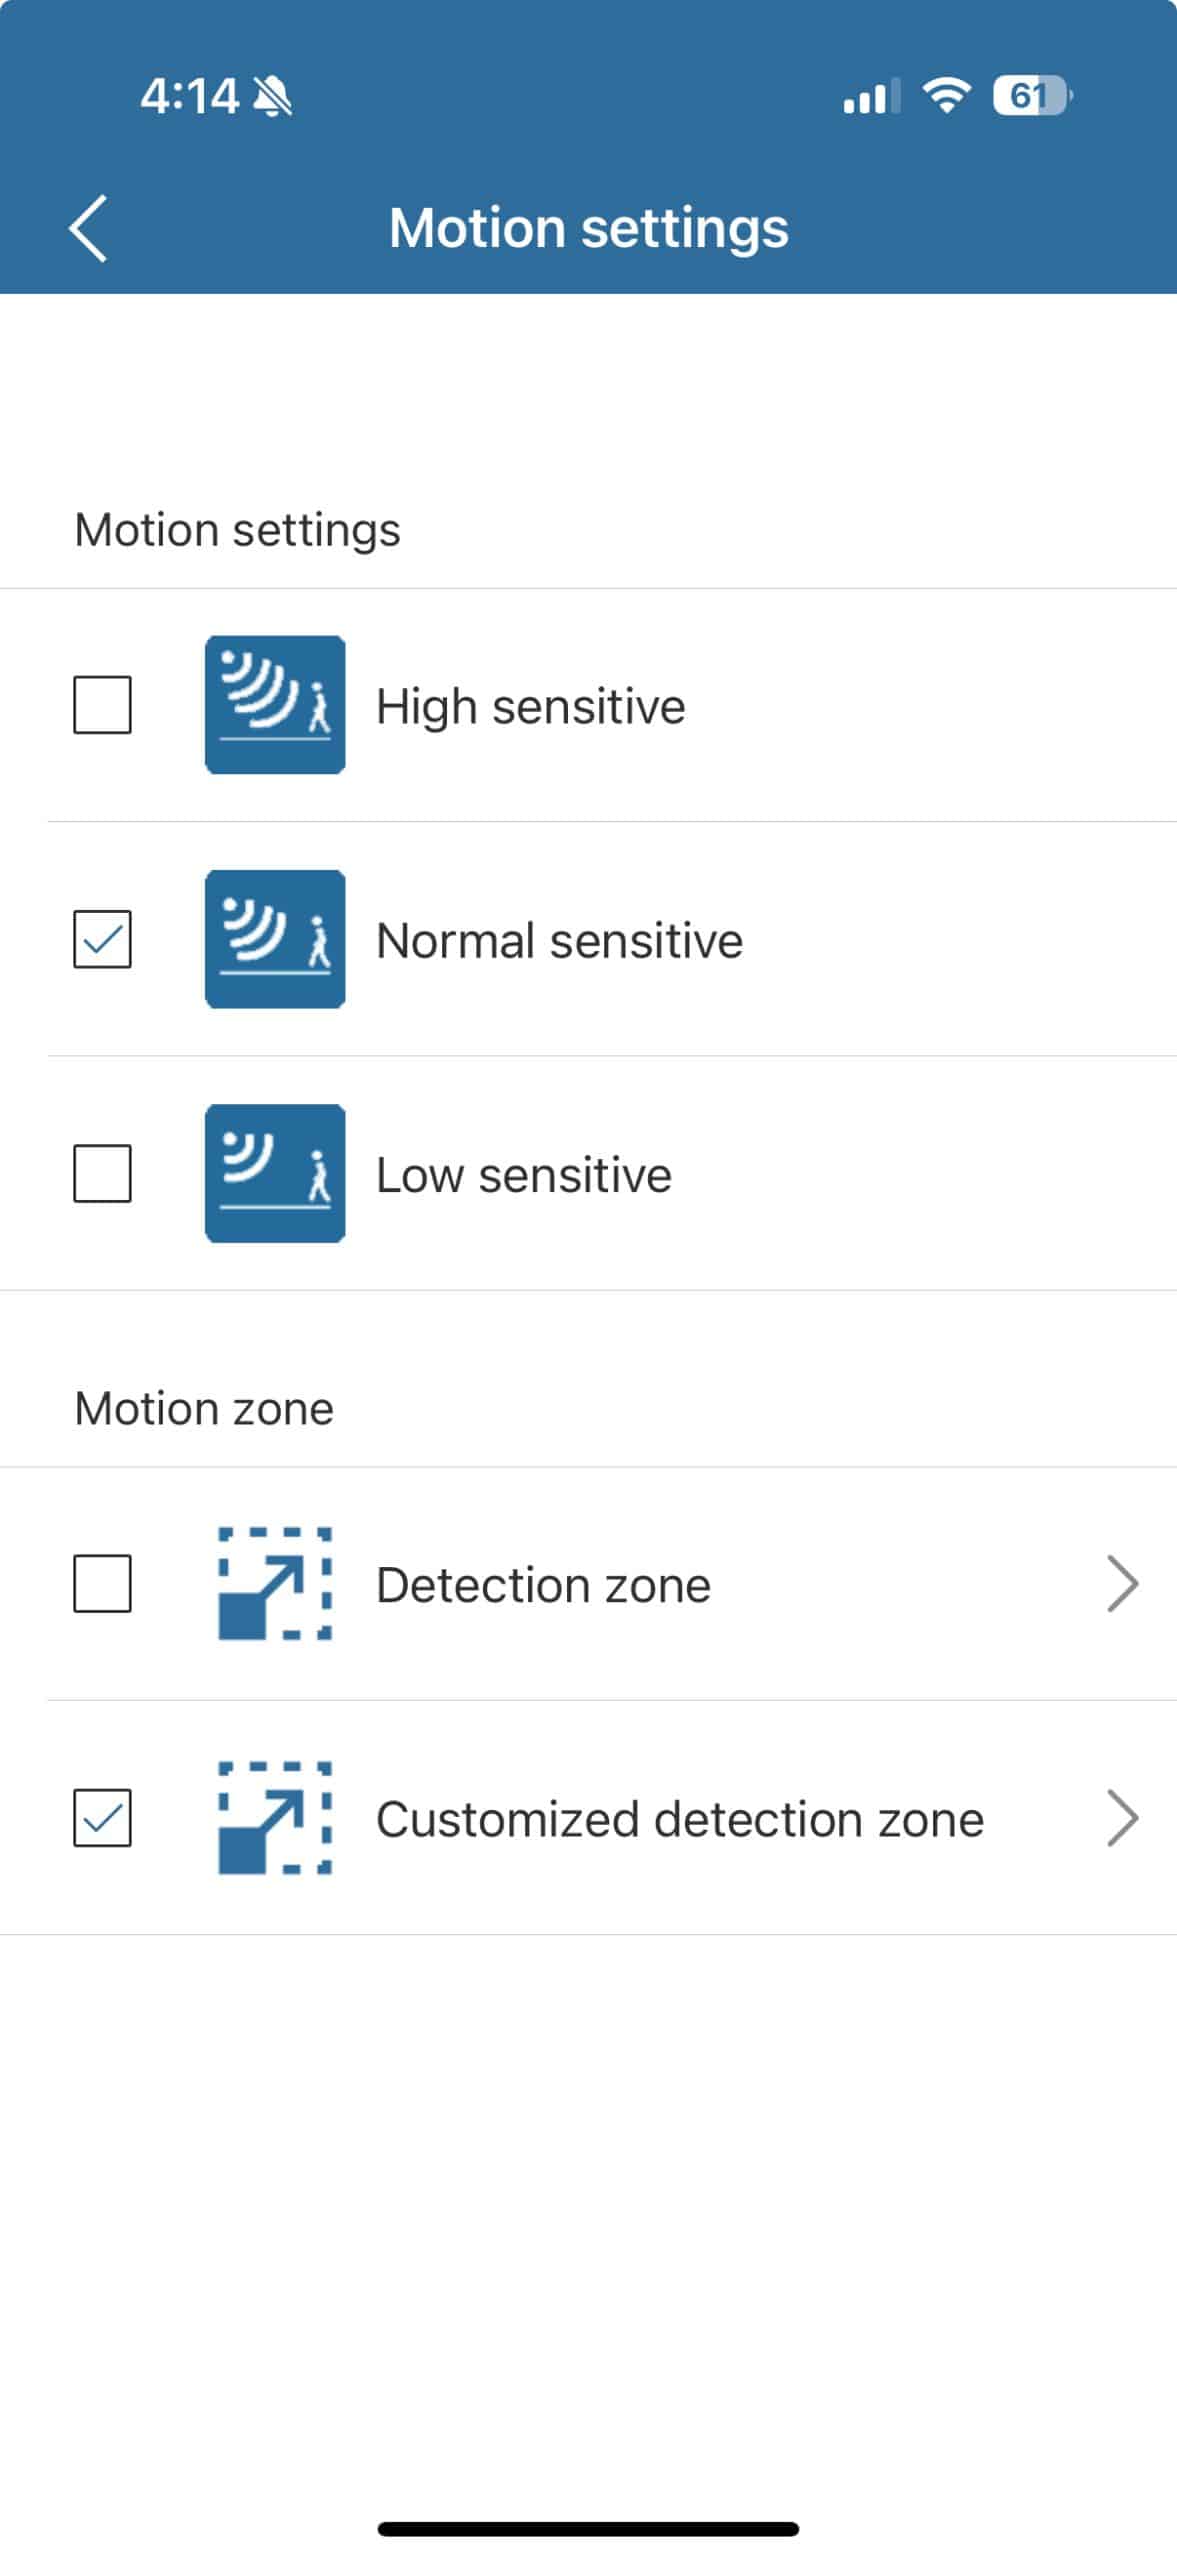
Motion Settings/Motion Zone Settings
Your SwamCam has two types of motion zones for detection.
The Basic Detection Area is a fixed rectangle which must be placed by adjusting the camera location, direction or placement. This is provided at no extra charge and is available on every SwamCam.
To Select the Basic Detection Zone, select detection zone, confirm the placement is optimal for your detection needs, then tap Save on the top right. Your selection will be saved and reflected on the Motion Settings page with a check mark.
If you have a Dual SwamCam system, each camera has its own motion zone and they both need to be setup after installation.

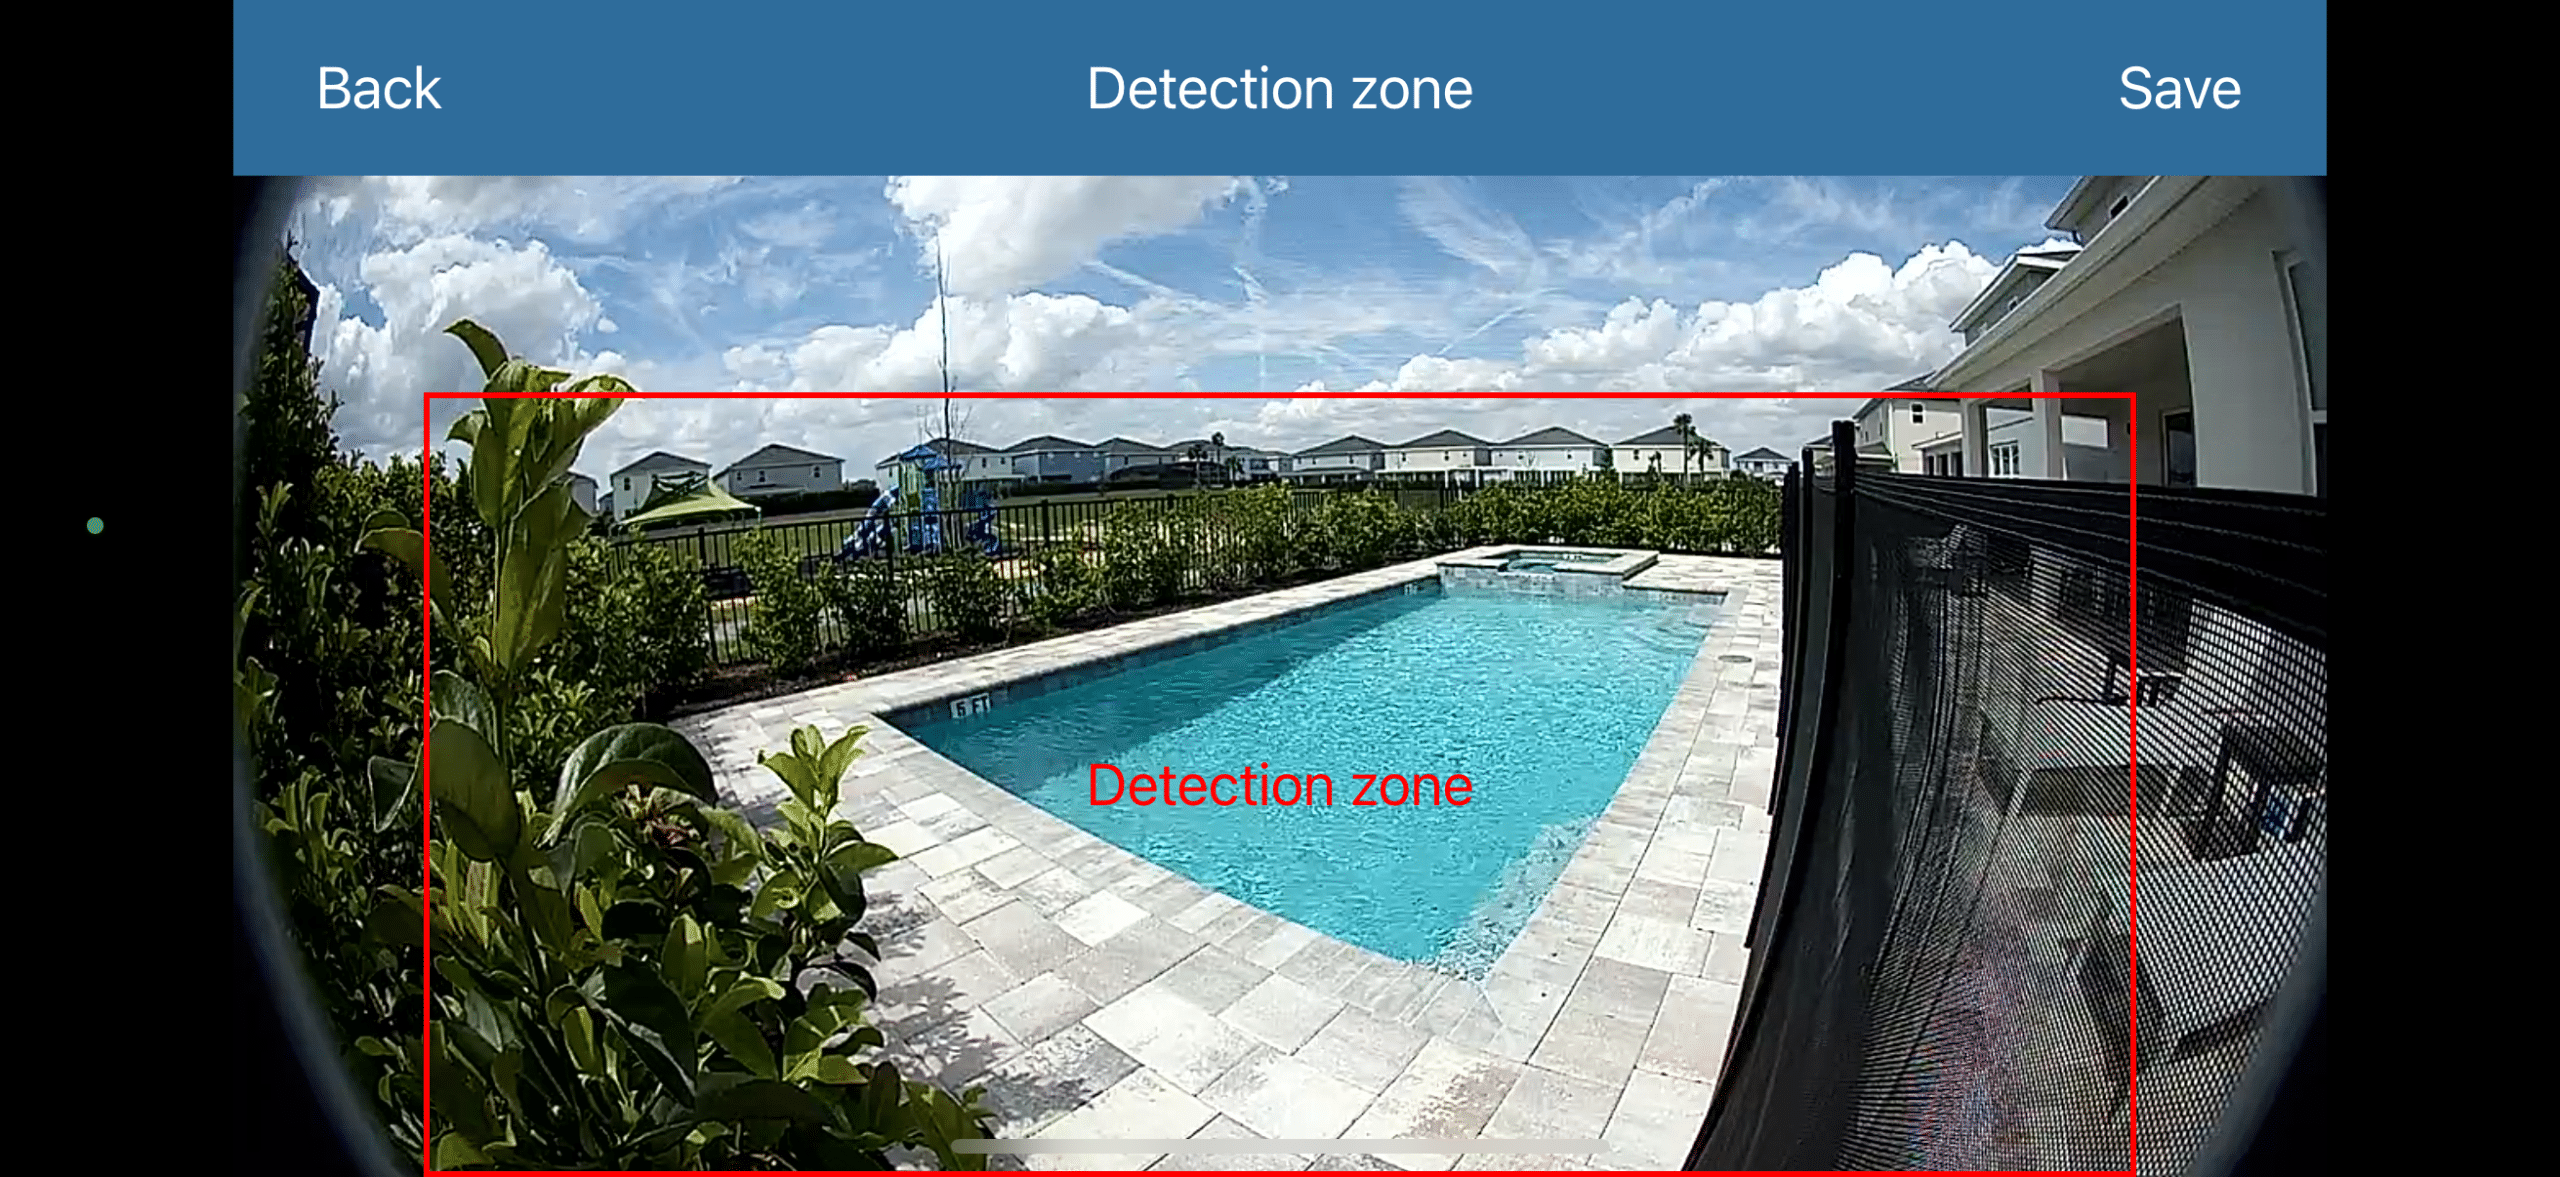
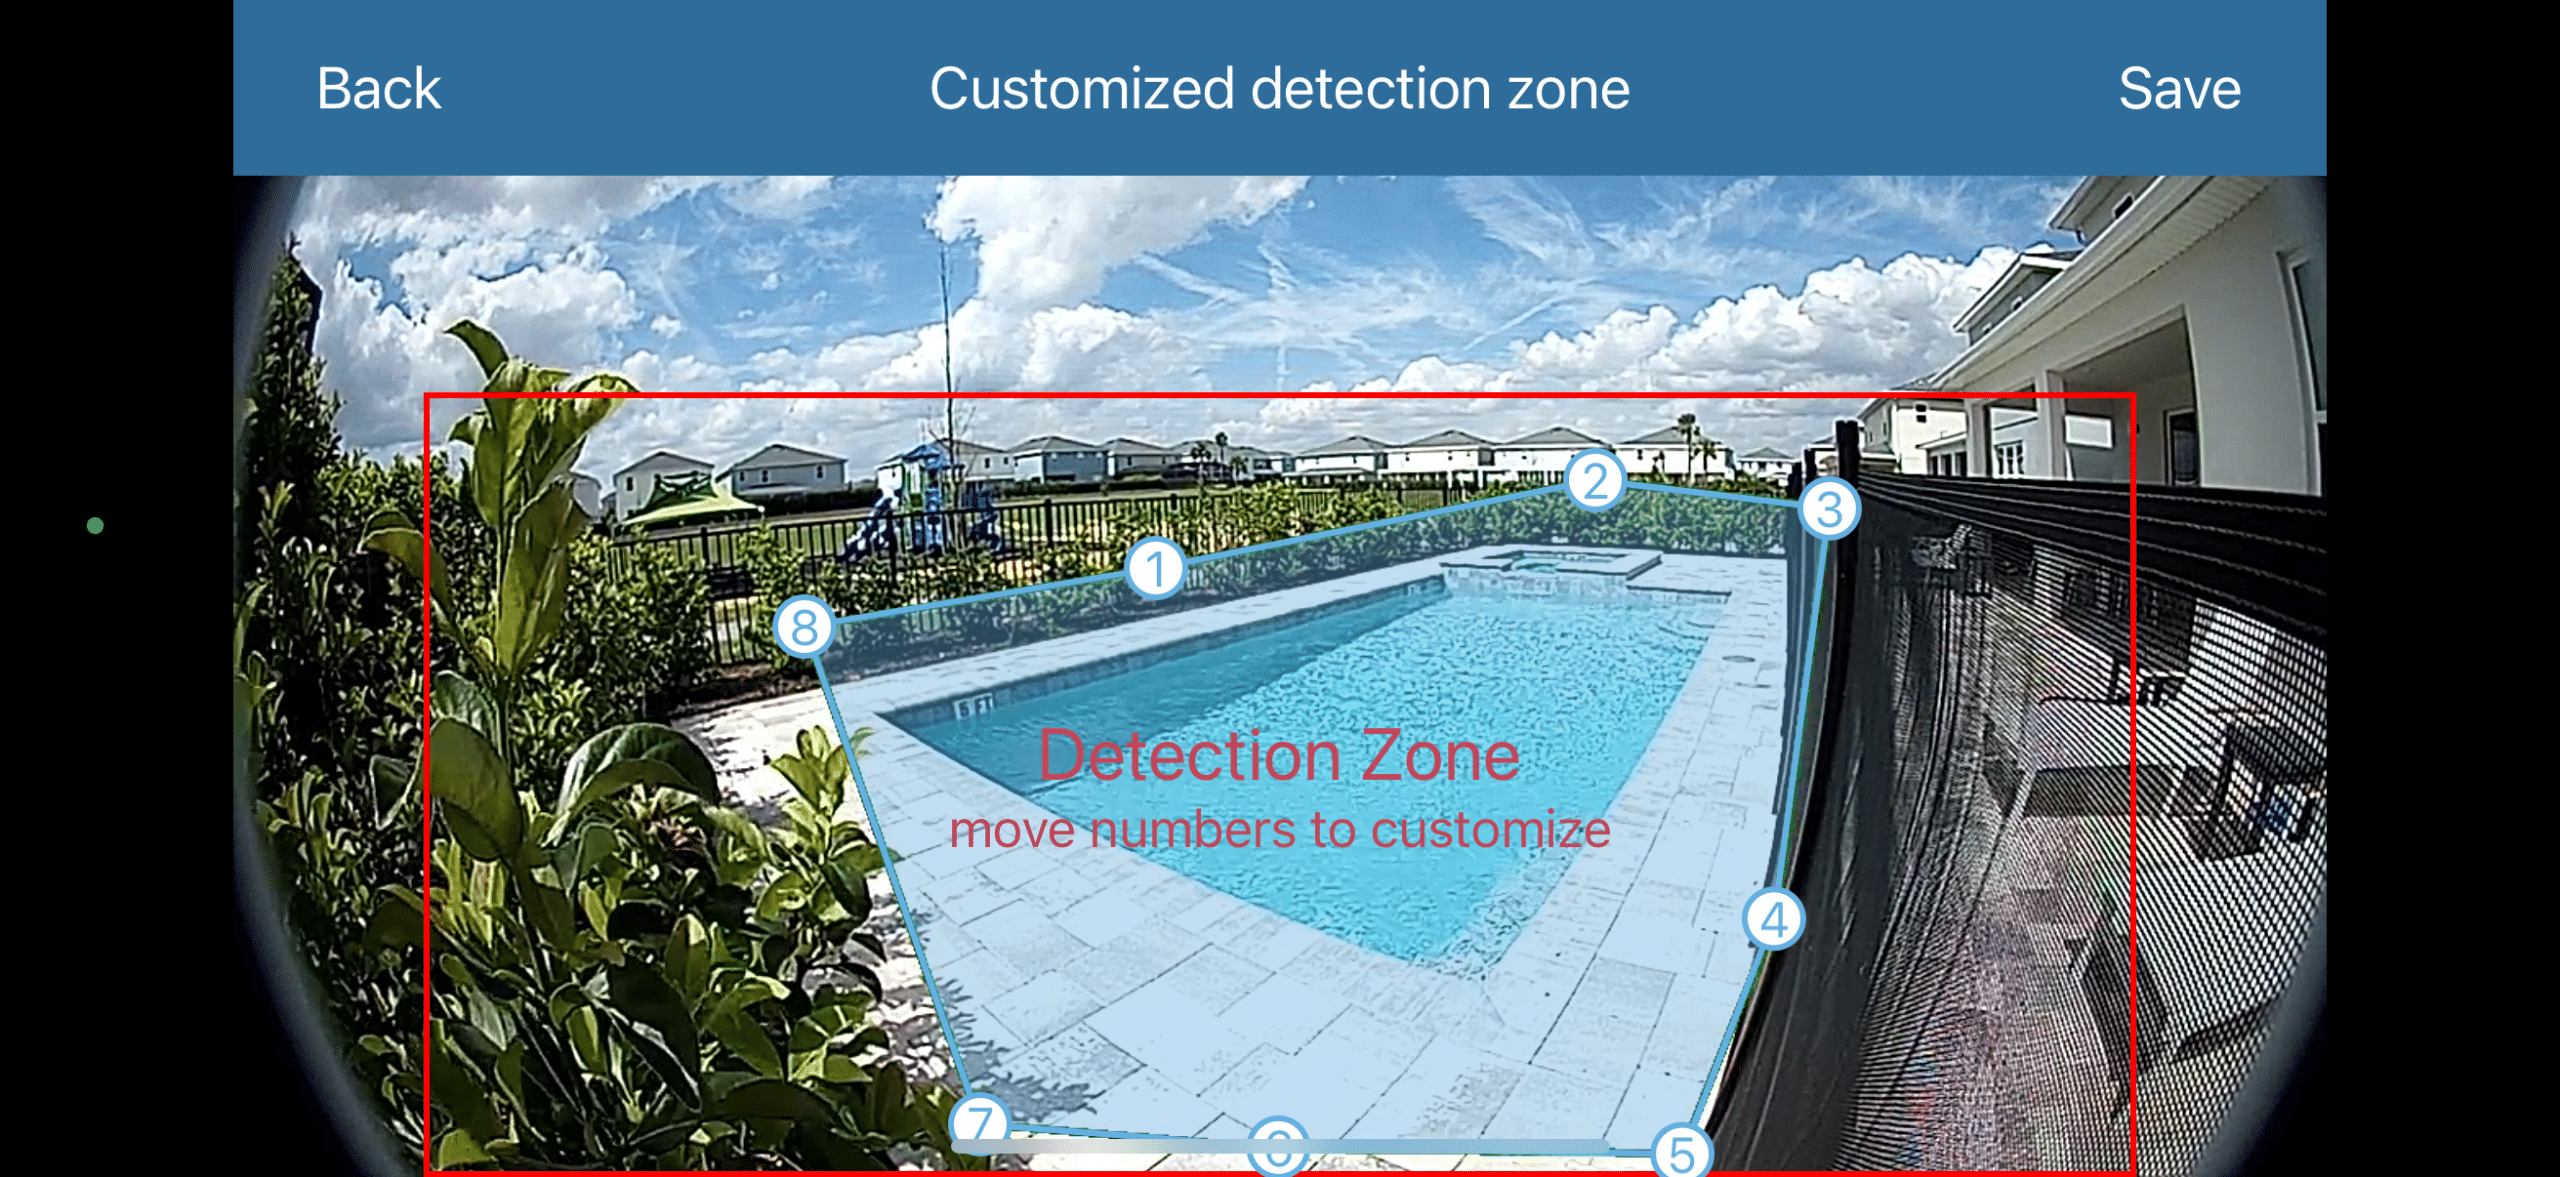
The Custom Detection Zone is a feature available to all Premium subscribers.
With the Custom Detection Zone you may set a defined perimeter around a particular area effectively eliminating all other visible areas from the Motion Detection.
Using the 8-point polygon, position each anchor point around the hazard and select Save on the top right when complete. This will save your perimeter and make the Custom Detection Zone your Motion Zone.
Please note, the anchor points or circles are part of the motion detection area, so if human motion is detected where an anchor circle is placed, it will alert. Additionally, due to the nature of the placement overlay, you may trigger alerts when not close to the zone due to a body part passing in front of the specified area.
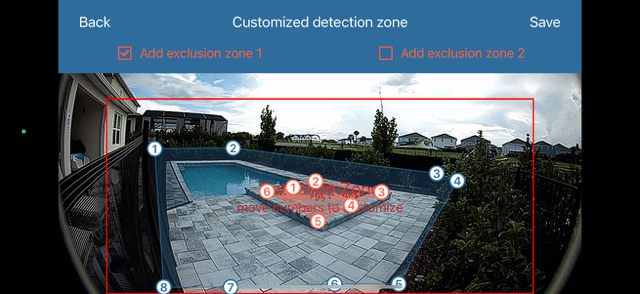
If there are areas within your custom motion zone that have a tendency to trigger false alarms, we have included the ability to add 2 “exclusion zones”. They are red, 6-point polygons that can be activated and placed within the detection zones to create areas that will NOT be scanned by the AI and alert for detection.
Exclusion Zones are available within the custom motion zone as a premium feature. If you have areas that are prone to trigger false alarms, simply place an exclusion zone on top of that area and it will not be scanned by AI. For instance in the image to the right, the spa has a bubbling feature that combined with light tricked the AI. You may add up to 2 exclusion zones, denoted in red.
Please note: placing an exclusion zone over an important area could prevent the camera from detecting motion you do want to be alerted to. Always test thoroughly after making any changes to ensure the system is still covering all critical areas.
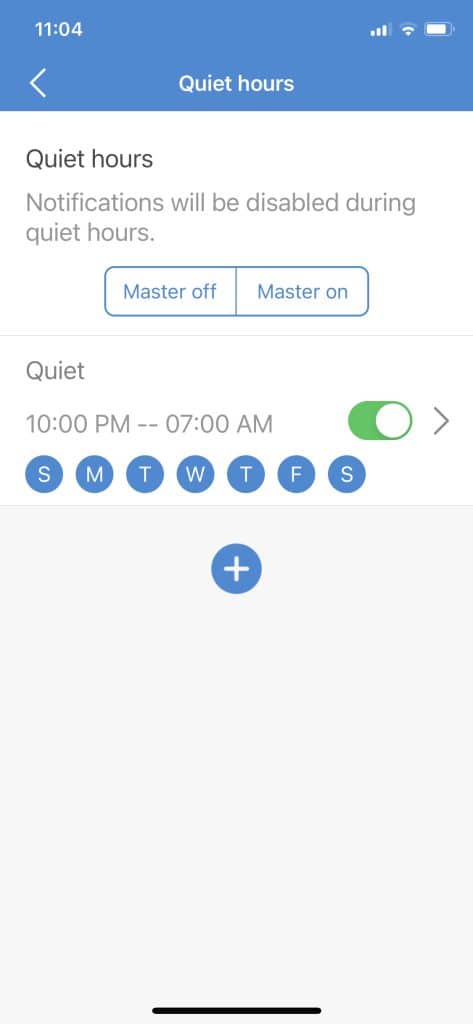
Quiet Hours Settings
Quiet Hours allow you to leave your system armed and it will not issue alarms or send alerts during specified times. For example, if your kids are at school M-F 8-3, you can set quiet hours on those days and you will not need to disarm the SwamCam to move freely near the pool without triggering alerts. When the quiet hours are over, the system will resume notifications.
You can program multiple sets of quiet hours. Just remember, when the quiet hours are active the SwamCam is not going to alert.
Sharing Access to your SwamCam
The account used to add the components to the SwamCam app is the Admin account. This account will always have access to the full array of settings and can make changes to the system. If you want to share access with other people but you only want them to receive alert and be able to arm and disarm the system, you can invite users. Tap the person icon on the top right of the SwamCam app homepage.
Tap “Current Shares” and you can see a list of all the users you are sharing access to your SwamCam with. You can also add new shared users here.

In Current Shares, tap the plus + icon to invite users to view your SwamCam. The invited user must have already signed up for a SwamCam account and installed the app. They will be sent a verification code you must enter into the app before then can gain access.
Premium Subscription Features
SwamCam offers Premium Subscription features. These are all value-added and enhance our product. Premium subscriptions are $3.99 per month/$39.99 annually.
Additional emergency dial feature
In addition to our built-in emergency 911, add a custom phone number, like a neighbor.
Live video recording
While the SwamCam does not record and store video, you can record from the live view screen manually and save that video to your mobile device’s storage.
2 year warranty
If you maintain a premium subscription without interruption we extend your warranty to 2 years.
Email/push notifications when the keypad
is used to disarm the system
In addition to the standard motion notification, you get the option to enable additional notifications.
Customizable voice alarm
Use the built-in options or record your own, including voice.
Customized detection zone
Draw a custom polygon within our rectangular detection zone creating specific coverage zones.
Customized keypad codes
Set distinct codes for individual users.
10% OFF future purchase
If you maintain a premium subscription without interruption and would like to purchase any additional peripherals or components please reach out to us and we will give you a 10% off coupon code.
Rename or Delete SwamCam
To rename your SwamCam system, tap settings>device information>”your system”.
You will then be able to rename or delete the system from here, note: deleting the camera will delete the other components as well.
Mobile App Password Reset
If you forget your SwamCam app password, don’t worry. From the login screen you can request a password reset. Be sure you have access to the email address of the account and respond to the reset notification.
Resetting the SwamCam Hardware
If you are switching networks or having technical issues you may try a full reset of the system.
First, go into the app settings then device information and tap on all the components and delete them from the app. (all the components, camera, repeater and keypad should be listed, if they are all not, the initial setup did not go correctly.) Always delete the camera last.
When resetting the SwamCam hardware, please perform the reset in the following order:
- Reset SwamCam Keypad.
- Reset SwamCam Alarm/Repeater.
- Reset SwamCam Simple Alarm (if purchased)
- Reset SwamCam Door/Window Sensors (if purchased)
- Reset SwamCam Secondary Camera (if purchased)
- Reset SwamCam Primary Camera.
Failure to reset in the proper order may result in difficulty in re-adding the components.
Camera (Primary or Secondary)
- When powered on and fully booted, Insert a small paperclip or provided reset tool (sim card tool) into the pinhole marked reset on the camera’s left side, you should feel a small button depress.
- Push and hold the paperclip or provided reset tool (sim card tool) until you hear the voice prompts. The camera will reset to factory default settings.
Alarm/Repeater or Simple Alarm
- When powered on and fully booted, insert a paperclip or provided reset tool (sim card tool) into the pinhole on the bottom of the alarm/repeater.
- Hold the paperclip or provided reset tool (sim card tool) for a few seconds until you hear the voice prompt.
- Release the paperclip or provided reset tool (sim card tool) and wait until you hear the device has reset and is ready for use.
Keypad
- Long press the “0” key for 5 seconds. When you hear a chirp (as opposed to the usual beep), press “0” four times fast, “arm” will flash rapidly if the keypad is reset successfully.
Door/Window Sensors
- Remove the sensor and magnet from the mount.
- Remove the backplate from the main portion of the sensor.
- Using a small paperclip or the provided reset tool (sim card tool), insert into the factory reset pinhole for 5 seconds until the led on the front of the sensor blinks red/green, then release the button.
Mounting Tips
Cameras
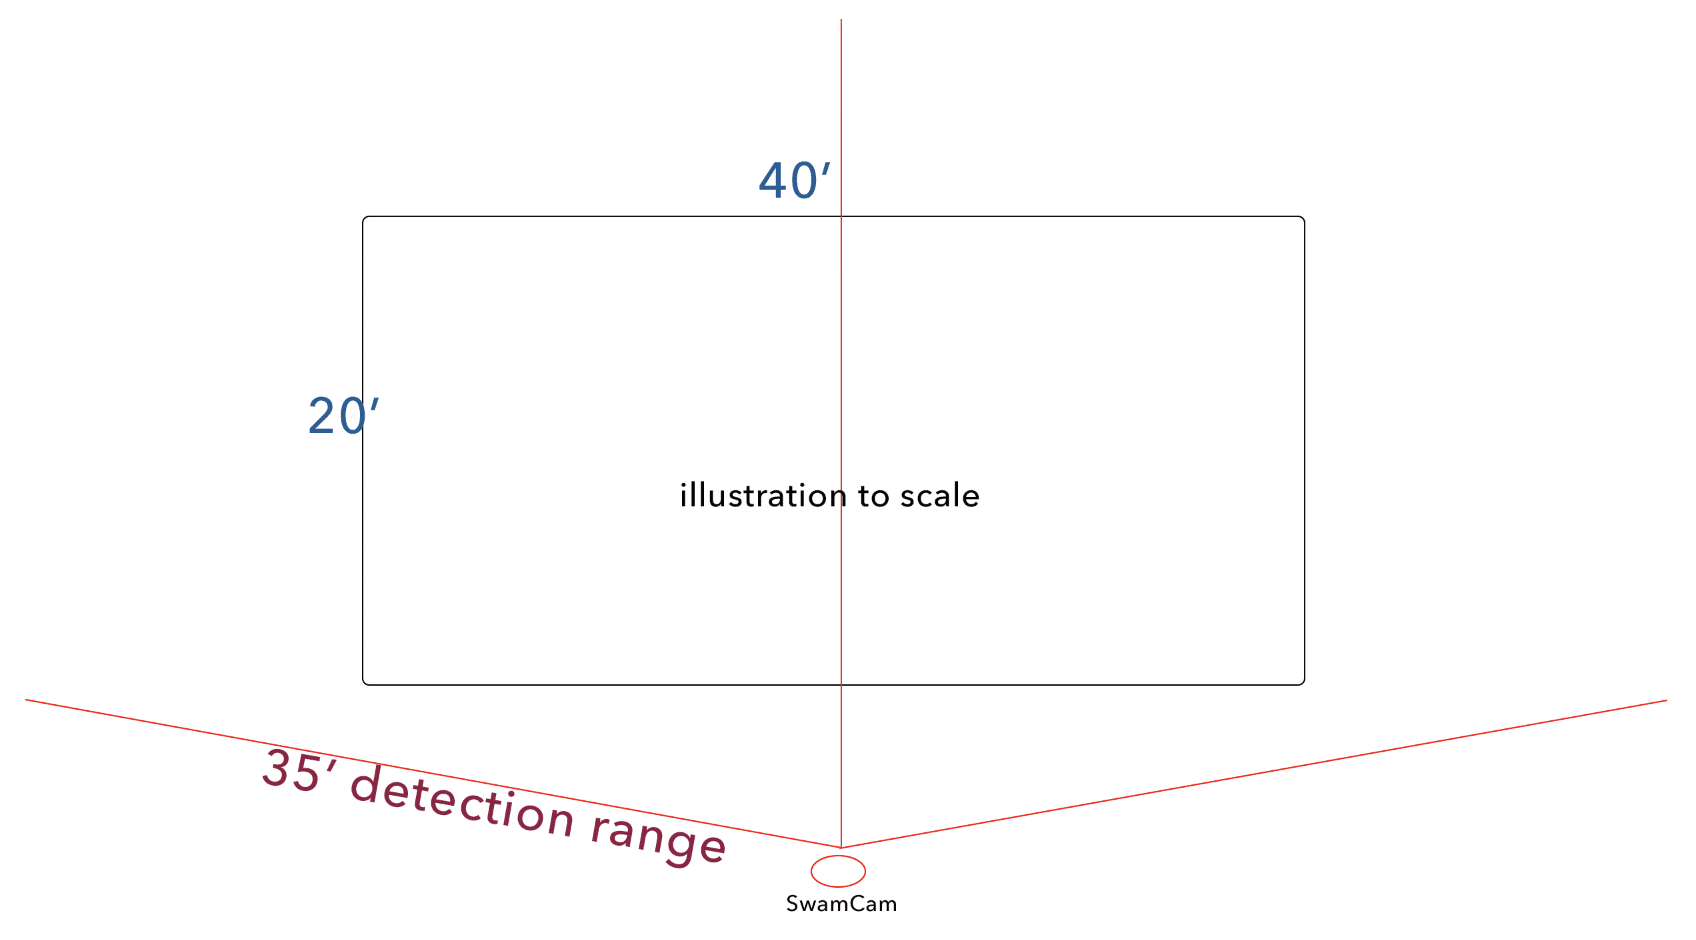
The SwamCam Camera has an effective detection range of approximately 35 feet when operating under optimal conditions. Environmental factors—such as strong shadows, glare, or partial obstructions—may limit detection performance at distances less than 35 feet. Users should not rely on detection at the maximum range in all circumstances and should ensure additional safety measures are in place.
The Camera can do its best detection if mounted between 4-6 feet in height from the surface of the pool. This way, the AI can see arms and legs rather than heads and shoulders.
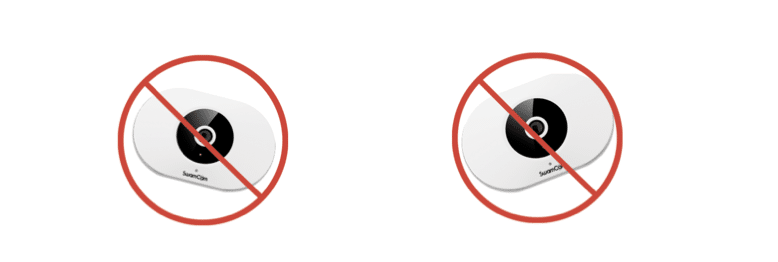
The Camera should be mounted with a level horizon, when you view the live view or motion zone setup screens the horizon line in the image should be level, not canted or tipped up at one corner.
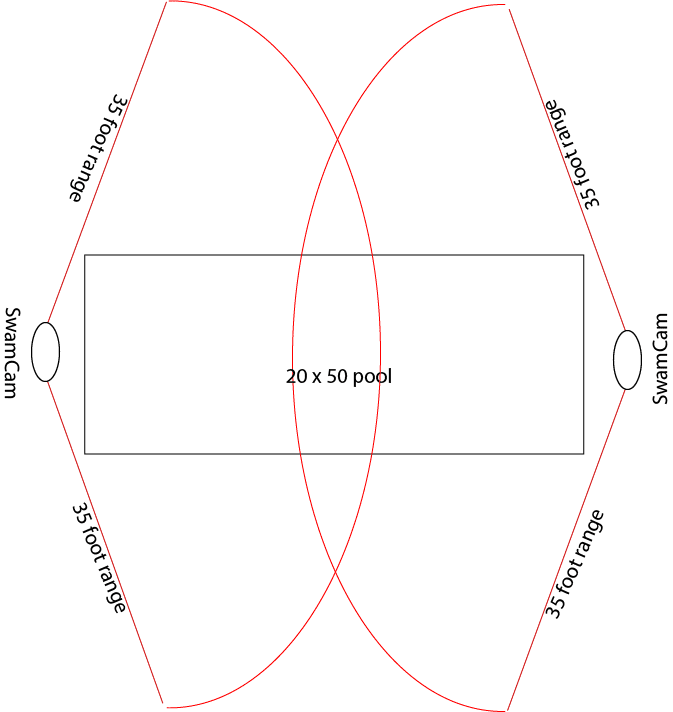
The lens is a fish-eye lens that has a 160° field of view. Please note the placement illustrations for single and dual camera systems.
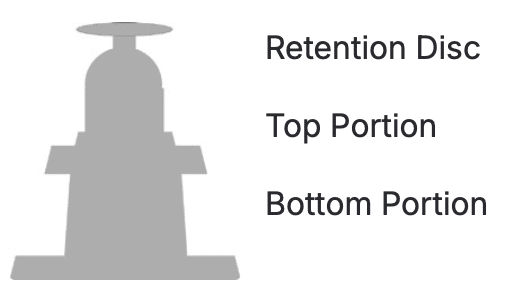
The Camera mount is powder coated for durability and weather-resistance. The mount separates in the middle to allow for easy removal of the camera. The white disc on the screw-in portion of the mount is not meant to be discarded. It is meant to be tightened against the back of the camera to create tension. Twist the silver portion of the mount into the camera one or two turns then tighten the disc to create tension. Loosen the center section of the mount to adjust the camera angle.
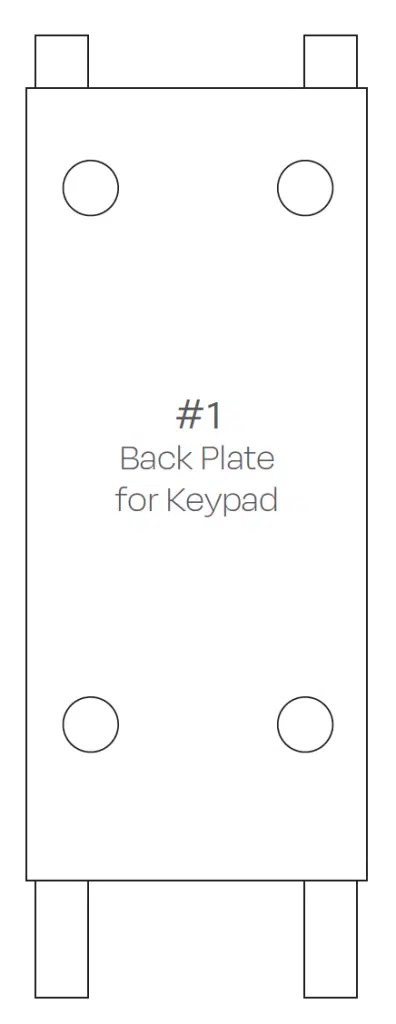
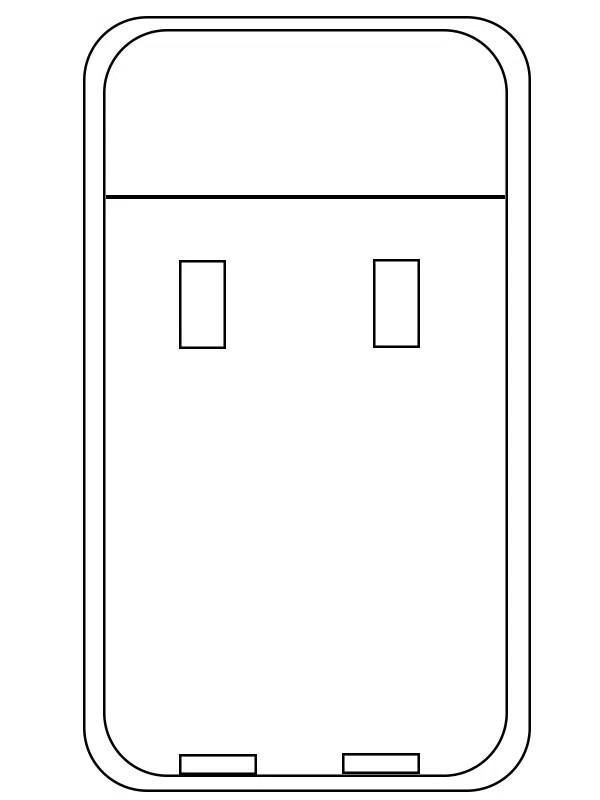
Keypad
The Keypad mount allows for the changing of batteries without having to remove mounting tape, etc…
The top two “ears” are meant to nest into the holes on the back upper portion of the keypad. The bottom two “ears” are meant to be inserted into the two small slots at the bottom of the black portion of the back where it meets the white rim. Once inserted the two small screw, located in the “nut and bolt” bag, should be threaded into the holes in the bottom of the keypad securing into the bottom tabs of the mount.
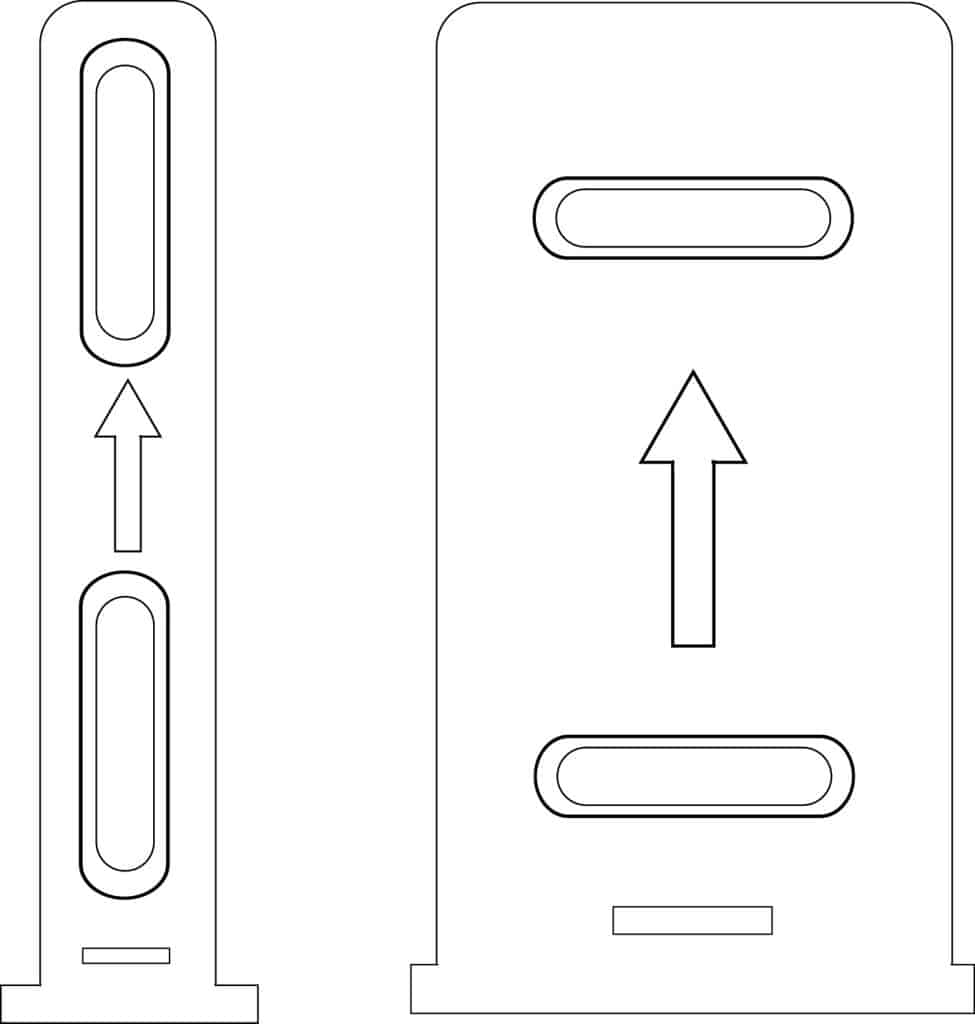
Door/Window Sensors
The door/window sensors have mounts meant to make it easy to remove the devices from the wall, door or window frame. The side with the arrow should be facing you when mounting. The arrow should be pointed up. Use the supplied screws to tighten the mount to the wall, door or frame. The sensor and the magnet side snap onto the mount. With a little pressure upward they can be removed from the mount to replace the batteries or take them down. The sensors have a maximum separation of 1 inch before they will alert as opened. Please mount within one inch or less of each other.
Periodic Testing
To ensure the SwamCam camera system continues to operate reliably, it is important to test the system at least once per month, steps 1, 2 & 3 once a week. Follow the steps below:
- Power On – Confirm that the camera LED light on the camera is on.
- System Status – Open the SwamCam app and verify that the system shows “Online.”
- Arming & Disarming – Test both the Arm and Disarm functions from the app to ensure the system voice prompts responds correctly from the camera and indoor alarm.
- Motion Detection – With the system armed, walk within the camera’s detection zone to confirm that the alarm is triggered by human movement.
- Open & Close – Test the door/window sensors confirm the LED responds accordingly and when left open, they send alerts.
If any of the above steps do not work as expected, refer to the troubleshooting section of this manual or contact SwamCam Support (888) 679-2622 or support@theswamcam.com for assistance.